Sunday, April 7, 2019

Date breakfast bars

We had a box of deglet noor dates (pitted) that was languishing on our countertop, so I decided to make these bars: https://smittenkitchen.com/2015/11/date-breakfast-squares/

Date Breakfast Squares
We cut these into 12 bars.
For the filling
1 1/2 cups (8 ounces) pitted dates, chopped
3/4 cup water
1 teaspoon finely grated orange (or mandarin or clementine) zest
For the crumbs
2 tablespoons packed brown sugar
1/4 cup raw or turbinado sugar
1/2 cup olive oil, coconut oil, melted butter or a mix of the above
3/4 cups rolled oats, I used quick-cooking but old-fashioned should work just fine
3/4 cup plus 2 tablespoons whole wheat flour, or a wholegrain flour mix of your choice
1/2 teaspoon ground cinnamon
A few gratings of fresh nutmeg
A pinch or two of ground cloves
1/4 teaspoon baking soda
1/4 teaspoon coarse sea salt
Heat oven to 400 degrees. Either grease bottom and sides of an 8×8-inch pan or line the bottom and sides with parchment paper.
In a small saucepan, combine dates, water and zest over low heat, simmering for 5 to 10 minutes, until liquid has absorbed and mixture has thickened. Set aside while you make the crumbs.
In a large bowl, mix the sugars and oil or butter together. Add the oats, flour, spices, baking soda and salt and stir to combine; the mixture should form a coarse rubble.
Press half into the bottom of your prepared pan. Dollop the date mixture over it and use a small offset spatula (or whatever you have on hand) to spread the mixture smoothly over the crumbs. Don’t worry if the crumbs move around a littleunderneath; these bars don’t require perfection. Sprinkle remaining crumbs over date layer and press lightly to cover.
Bake bars for 25 minutes, or until light brown at the edges. Cool in pan. Cut into squares. They’ll keep just fine at room temperature but will last up to a week in the fridge and longer in the freezer.
My notes:
1. I made a mistake and forgot to chop the dates up prior to stewing them. sigh. So I had to blend them in the blender and probably added close to a half cup more water to get them to blend.However, this ended up working out just fine, and I'd consider doing it again to get a more even filling consistency.
2. I used half butter and half olive oil for the fat. I also used half rolled outs and half instant oats. I would do that again, if possible.
3. I used whole wheat flour.
4. I zested 3 small mandarins. We could taste the citrus after the stewing step, and I even added more zest before the top crumb layer, but we didn’t taste the citrus after the bake. I’d consider adding more.
5. I’d also consider adding chopped walnuts— not sure how. Maybe mixed into the date purée? Maybe mixed into the crumb on top? I think I'm leaning toward chopping them finely and putting them into the crumb topping.

Update:
I made these again on 6/8/19
1. This time I used a mix of olive oil and coconut oil. The bars definitely turned out crumblier without the butter but I was able to slice them into bars without too much trouble after refrigerating them overnight.
3. I chopped maybe a half cup of pecans and mixed them into the top layer of crust. Delicious and I would do that again.
3. I zested a little extra orange peel over the date purée and the flavor came through better this time.
4. I also made the date purée ahead of time and froze it in the freezer, defrosted it overnight and it worked well. If I have a surplus of dates for some reason, I’d consider keeping a bag in the fridge for a quick dessert.


Vegan cream of mushroom soup

From Sarah Britton's Naturally Nourished cookbook: "The only cream of mushroom soup I ate as a kid was the canned variety—the one that plopped out of its claustrophobic aluminum home and retained its cylindrical-tin shape. You know the one I mean. 

These days, I still love mushroom soup, but I make it from scratch without dairy. What is the secret to the creaminess without the cream? By blending cooked beans with vegetable broth, you end up with a totally luxurious texture that mimics heavy cream but is virtually fat free. In addition, beans deliver healthy, vegetarian protein and a serious dose of filling fiber. It tastes as if you are eating the richest soup of all time, but it’s a delicious illusion that warms you up, fills you up, but doesn’t fill you out! 

To take this delicious soup to the next level, you must make the Garlic Herb 
Croutons. They are ridiculously rich, perfectly seasoned, and extra 
crunchy. You’ll be finding reasons to make soup just to eat them!" 
https://food52.com/recipes/75760-luxurious-cream-of-mushroom-soup-with-garlic-herb-croutons


Ingredients
For Luxurious Cream of Mushroom Soup
  • 1large leek
  • 1tablespoon coconut oil or ghee
  • 3medium yellow onions, chopped
  • 1teaspoon fine sea salt, plus more as needed
  • 1teaspoon freshly ground black pepper, plus more as needed
  • 2teaspoons fresh thyme leaves (or 1 teaspoon dried), plus more for garnish
  • 4bay leaves
  • 4garlic cloves
  • 14ounces / 400 grams cremini mushrooms
  • 2cups / 500 vegetable broth
  • 1cup / 250 ml plant-based milk of your choice
  • 1 1/2cups / 250 grams (about 1 15-ounce an) white beans, such as navy, butter, cannellini, or great Northern, drained and rinsed
  • 1 1/2teaspoons balsamic vinegar
  • Garlic-herb croutons (recipe follows)
For Garlic-Herb Croutons (makes 4 cups)
  • 1 1/2teaspoons coconut oil
  • 1/2teaspoon garlic powder
  • 1/2teaspoon onion powder
  • 1/4teaspoon dried thyme
  • 1/4teaspoon dried oregano
  • 1/4teaspoon fine sea salt
  • 4cups 330 grams cubed whole-grain bread

Directions
For Luxurious Cream of Mushroom Soup
  1. To prepare the leek, cut the white and light-green parts in half lengthwise and then crosswise into chunks. 
  2. In a large stockpot, melt the coconut oil over medium heat. Add the onions, leeks, salt, black pepper, thyme, and bay leaves. Cook until the onions and leeks are soft, about 5 minutes. Mince the garlic, add it to the pot, and stir. 
  3. While the onions, leeks, and garlic are cooking, clean the mushrooms by removing any dirt or natural debris with a damp cloth (do not wash them in water). Cut the mushrooms into quarters and add them to the pot. Cook until they are dark brown and very soft, 10 to 15 minutes. Add the broth and stir. 
  4. Meanwhile, combine the milk and beans in a blender and blend on high until smooth.
  5. When the mushrooms are cooked, add the vinegar and about one third of the soup to the blender with the blended beans. Blend on high until creamy, then pour the mixture back into the pot with the remaining soup, stir well, and reduce the heat to low. Simmer for 5 minutes. Thin the soup with water if desired.
  6. Season with plenty of freshly ground black pepper and sea salt. Ladle the soup into bowls and sprinkle with the croutons and some fresh thyme sprigs. 
For Garlic-Herb Croutons (makes 4 cups)
  1. Preheat the oven to 325F/160C.
  2. In a small saucepan, melt the coconut oil over medium heat. Add the garlic and onion powders, thyme, oregano, and salt, whisking to combine. 
  3. Place the bread cubes on a rimmed baking sheet and pour the oil mixture over the top, tossing very well to coat the bread. Bake until the croutons are golden, fully toasted, and dry, 35 to 45 minutes. Store leftovers in an airtight glass jar at room temperature for up to 2 weeks.


My notes: I made the soup. I used two large onions, two leeks, and fresh thyme. I also used coconut milk as the plant-based milk of choice and I opted for ghee and not coconut oil. I used canelini beans. Overall the soup is okay. I think I want more mushrooms and more depth than this soup offered. Frankly it tasted like the vegan mushroom gravy from the first mess but without as much oomph. However, it is a relatively healthy recipe and TK liked it, so maybe would make again?


Friday, March 29, 2019

Mexican salad (serveable)

1. Romaine (chopped into squares)
2. Cilantro (finely chopped and mixed in)
3. Cherry tomatoes (halves)
4. Mushrooms (cooked, with salt)
5. Pickled red onions (finely sliced, pickled in lemon juice with salt and sugar)
6. Orange bell pepper (sliced and then into inch long pieces()
7. Corn (used frozen sweet from TJs, which I defrosted)
8. Cotija

Mix above together.

9. Avocado (small chunks)
10. Toasted pepitas and chopped smoked almonds
11. Yogurt-agave-lime/lemon dressing ( yogurt, olive oil, lemon juice, salt, pepper, Chile-lime seasoning)

Tuesday, March 12, 2019

Double peanut chocolate chip cookies

Recipe: from Family Circle (https://www.familycircle.com/recipe/cookies/double-peanut-chunk-cookies/)

Ingredients
2 1/3 cups all-purpose flour
1 teaspoon baking soda
1/2 teaspoon salt
1 cup unsalted butter, softened
1 cup light brown sugar
3/4 cup granulated sugar
2 eggs
1 teaspoon vanilla extract
1 cup unsalted peanuts, chopped
1/2 of a 12-ounce bag Reese's Dark Chocolate Peanut Butter Cups Miniatures, coarsely chopped

Directions
1.      Heat oven to 325 degrees
2.      In a large bowl, whisk together the flour, baking soda and salt. Set aside.
3.      In another large bowl, beat butter, brown sugar and granulated sugar on medium-high speed until light and fluffy, about 3 minutes. Beat in the eggs and vanilla until blended. On low speed beat in the fl our mixture until just blended and a dough forms. Stir in the peanuts and chopped chocolate cups.
4.      Using a 1/4-cup ice cream scoop or measuring cup, drop dough in slightly rounded mounds onto ungreased cookie sheets, about 3 inches apart.

5.      Bake at 325 degrees for 22 minutes or until crispy around the edges and slightly golden. Place baking sheet on cooling rack for 3 minutes. Remove cookies to rack to cool completely.


Notes:
I followed the recipe exactly. The only difference I made was I used some portion of almond butter cups because I ran out of peanut butter cups. I rolled them into 1.5 oz balls.
Though yummy, these cookies spread a lot, even after being in the fridge for several hours. Probably would not make again. They aren't bad, but they don't satisfy a chocolate chip cookie craving, nor do they satisfy a peanut butter cookie craving. They get crispy-chewy, with good ridges, though. In my oven they take closer to 16 minutes to bake.

Photos:


Cheese crackers

I have always wanted to make my own cheese crackers. Everytime I've attempted it, though, they never taste good-- often they don't crisp up or they lack flavor.


The recipe, from NYTimes:
(https://cooking.nytimes.com/recipes/1020040-cheese-crackers)
Cheddar crackers. Cheese wafers. Coins, biscuits, straws and crisps. Known by many names and claimed by many grandmothers, they are all the same, delicious thing: a savory, addictive, shortbread cookie. The key to any short dough — that distinctive tender sandy crumbly texture — is the high fat-to-flour ratio, and this version not only relies on butter but also counts on the delicious fats that come from sesame seeds, block Cheddar and even the oil from the pecans. For a remarkable distinction among the many, many versions of these to be found, toast them until just passing golden into brown, and see how that in itself sets these apart.

INGREDIENTS
1 ⅓  cups all-purpose flour
1  cup loosely packed grated Cabot Farms Vermont white Cheddar (about 3 ounces)
⅔  cup loosely packed grated pecorino Romano cheese (about 1 ounce)
1  teaspoon kosher salt
½  teaspoon cayenne
8  tablespoons (1 stick) cold unsalted butter, cut into 1/4-inch cubes
1  large egg yolk
⅓  cup pecans, finely chopped (about 3 tablespoons)
3  tablespoons untoasted white sesame seeds
2  tablespoons ice water

PREPARATION
1.      Add the flour, both cheeses, salt and cayenne to the bowl of a food processor, and pulse until combined.
2.      Scatter the cold butter chunks on top, and pulse again to form coarse crumbs.
3.      Add egg yolk, pecans and seeds, and pulse to combine thoroughly, yielding a coarse grainy meal.
4.      Transfer mixture to a large stainless-steel bowl. Sprinkle the ice water on top, and knead briefly to bring the dough together, as you would a pie dough.
5.      Divide the dough into thirds, and roll each into a neat, 8-inch-long cylinder that is about the width of a silver dollar. Wrap each log in plastic wrap, and twist the ends tightly in opposite directions, forming a perfect and compact torchon. Refrigerate until well chilled and completely firm; overnight is ideal.
6.      Heat the oven to 375. Line two large baking sheets with parchment paper or nonstick baking mats. Unwrap the dough, discarding plastic wrap, and slice the logs into thin coins, each about the width of a pencil.
7.      Arrange the coins in neat rows on the prepared sheets, making sure they’re not quite touching one another. This dough won’t expand or flatten after baking.
8.      Bake until golden at their centers and just starting to toast at their edges, about 20 minutes. Check them midway through baking, and rotate sheets if your oven bakes unevenly.

9.      Transfer the baking sheets to wire racks to cool. Once they are fully cooked, transfer coins to an airtight container, where they will keep for up to 3 weeks.


My Notes:
This came together pretty easily in the food processor.
It needed far less that twenty minutes in my oven, I’d start checking at the 14 minute mark. They don’t spread a ton but each disk does require some space so don’t overcrowd the baking tray.
These get nice and crispy, and I would totally make these again! TK and his mom both approve. These taste fantastic even a few days later.

Made again and took out a few minutes earlier and they were great.


on 4/21/19 - made again-- this time using Wisconsin extra sharp yellow cheddar, and I measured the pecorino volumentrically and I weighed it, and I found that 2/3 cup, loosely packed was closer to 1.8 oz. I would use the 1.8 oz correction in the future and I’d also use yellow cheddar again. This was done at nearly the 12 minute mark!

on 12/8/20 - Made again with Wisconsin sharp cheddar (2.8 oz) and 1.8 oz of pecorino. I also used a smidge of whole wheat pastry flour (like a little less than 1/3 cup) along with the APP. I did the oven at 370 degrees and these baked in about 13 minutes to a nice light gold color. I would use two of the smaller cookie sheets and really don't try to fit them onto one pan. Give them some room to cook!


Vegan Chocolate Chip Cookies

I saw these cookies on Instagram and the pictures looked amazing!


Recipe directly from:
https://tendingthetable.com/2018/10/31/perfect-vegan-chocolate-chip-cookies/

PERFECT VEGAN CHOCOLATE CHIP COOKIES

Makes 2 dozen
INGREDIENTS
3 tablespoons ground flax
4 tablespoons water
4 ounces vegan butter (I used Miyokos)
1 cup coconut sugar
1 teaspoon vanilla extract
1/2 teaspoon baking soda
1 1/3 cup flour (I used Eat Grain sifted red fife)
1/4 teaspoon fine sea salt
3/4 cup bittersweet chocolate chunks
PROCEDURE
Combine the ground flax and water in a small bowl and stir to combine. Allow to gel for a few minutes.
In the bowl of a stand mixer fitted with the paddle attachment combine the butter and sugar. Beat on medium high until light and fluffy.  Add the soaked flax and vanilla and mix again. Add the baking soda, flour, and salt and mix on medium until well combined. Stir in the chocolate chunks. Cover the bowl and chill the dough for at least 1 hour, ideally overnight.
When ready to bake preheat the oven to 350°F. Line a baking sheet with parchment. Scoop heaping tablespoons of dough onto the prepared baking sheet, leaving 1-2 inches of space between each cookie. Bake for 10-12 minutes, until beginning to brown around the edges. Allow to cool slightly, before serving.
Notes: 
I used APP flour and saw no major issue with the spread. If you go to the original blog post, the author says that APP didn't work as good for her. 
I used Miyoko’s as well, and I used TJ's coconut sugar. I basically followed the recipe to the T. I thought the dough came together nicely and felt like nonvegan cookie dough. Easy to roll into balls. 
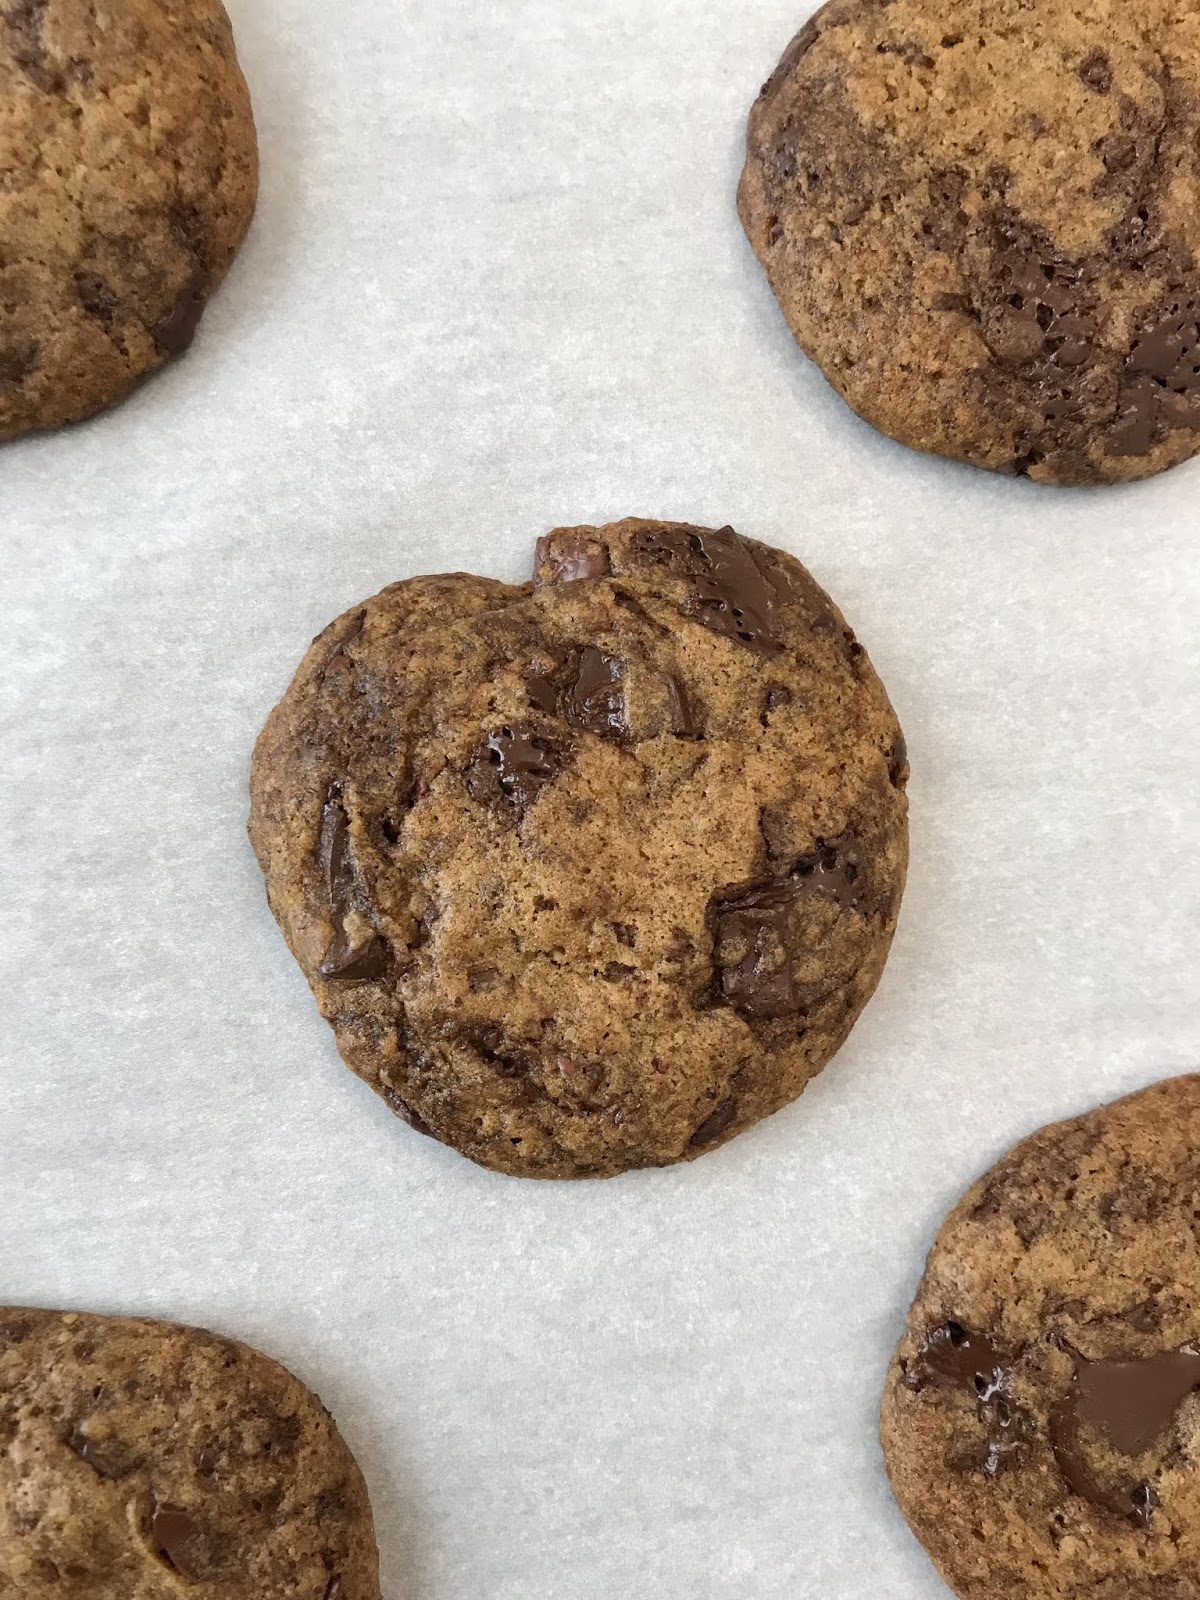
I didn’t love them, but TK loved them. They are best warm. The next day they get quite chewy. Would I make again? Unsure. Maybe just for vegans. They are visually rather appealing, I must say. 


Photos: 


Saturday, March 2, 2019

Whole wheat pancakes

Whole wheat pancakes! From cookie and Kate:


INGREDIENTS

  • 1 cup white whole wheat flour or regular whole wheat flour
  • 1 tablespoon baking powder (notbaking soda!)
  • ½ teaspoon ground cinnamon
  • ¼ teaspoon fine sea salt
  • ⅔ cup milk of choice*
  • ½ cup mashed ripe banana (from about 1 large banana), plus another banana for slicing on top
  • 1 large egg
  • 2 tablespoons maple syrup or honey, plus more for serving
  • 2 tablespoons melted unsalted butter or coconut oil
  • ½ teaspoon vanilla extract
  • Optional toppings: sliced banana, maple syrup, peanut butter or almond butter

INSTRUCTIONS

  1. If you’re using an electric skillet, preheat it to 350 degrees Fahrenheit now. In a medium bowl, combine the flour, baking powder, cinnamon and salt. Whisk to blend.
  2. In a smaller bowl, combine the milk, mashed banana, egg, maple syrup, butter and vanilla. Whisk until blended. Pour the liquid mixture into the flour mixture and mix just until combined.
  3. If you are not using an electric skillet, heat a heavy cast iron skillet or nonstick griddle over medium-low heat. You’re ready to start cooking pancakes once a drop of water sizzles on contact with the hot surface. If necessary, lightly oil the cooking surface with additional butter or coconut oil, carefully wiping up excess with a paper towel (nonstick surfaces likely won’t require any oil).
  4. Using a ⅓-cup measuring cup, scoop the batter onto the hot skillet, leaving a couple of inches around each pancake for expansion. Cook until small bubbles form on the surface of the pancakes, 2 to 3 minutes (you’ll know it’s ready to flip when about ½-inch of the perimeter is matte instead of glossy).
  5. Flip the pancakes, then cook until lightly golden on both sides, 1 to 2 minutes more. Repeat the process with the remaining batter, adding more butter or oil and adjusting the heat as necessary.
  6. Serve immediately or keep warm in a 200 degree Fahrenheit oven. If desired, top individual servings with a spread of peanut or almond butter and/or sliced bananas, and serve with more maple syrup or honey on the side.
  7. Leftover pancakes can be stored in the refrigerator for up to 3 days, or frozen for up to 3 months. To reheat, stack leftover pancakes and wrap them in a paper towel before gently reheating in the microwave.
My notes:
1. I used whole wheat flour, not WW pastry nor white whole wheat flour. So, the pancakes came out quite brown.
2. I used puréed banana— not sure if it was half a cup exactly or not.
3. Used a mix of whole and 2% milk
4. Omitted the vanilla extract
5. After I mixed the batter, it sat out for about two hours on the counter before I made the pancakes on the stovetop
6. Served with toasted chopped almonds.

They were pretty excellent for whole wheat pancakes— as good as if not better than Kodiak cakes. I think resting the batter really helped and would definitely do that again, maybe by making it the night before and bringing it to room temperature the morning of.

My pictures: