Thursday, December 20, 2018

Baked Pasta Alla Norma (aka Spaghetti Pie)

Found this recipe in Bon Apetit, and I had an open can of tomato paste in the fridge I wanted to use up. Also, I was taken by the name— spaghetti pie sounds like everything that is right in this world.

From Bon Apetit


Ingredients

  • 1 medium globe eggplant, peeled, cut into ½" pieces
  • 2 pints cherry tomatoes
  • 8 garlic cloves, smashed
  • ¼ cup extra-virgin olive oil, plus more for skillet
  • ½ tsp. crushed red pepper flakes, plus more for sprinkling
  • Kosher salt
  • 2 large eggs
  • 2 Tbsp. tomato paste
  • 4 oz. finely grated Parmesan, divided
  • 1 lb. spaghetti
  • 2 Tbsp. drained capers
  • ½ cup torn basil, plus a few whole leaves

Preparation

  1. Preheat oven to 425°. Combine eggplant, tomatoes, garlic, ¼ cup oil, and ½ tsp. red pepper flakes in a large ovenproof skillet, preferably cast iron. Season generously with salt and toss to combine. Roast, shaking skillet once or twice, until eggplant is tender and tomatoes burst, 25–35 minutes. Let vegetables cool while you prepare the pasta (watch out for the hot handle when you take the skillet out of the oven). Reduce oven temperature to 400°.
  2. Whisk eggs and tomato paste in a medium bowl until smooth, then whisk in about three-quarters of Parmesan.
  3. Cook spaghetti in a pot of boiling salted water, stirring occasionally, until al dente. Immediately drain pasta in a colander and shake to remove excess water; transfer pasta back to pot.
  4. Add cooled vegetable mixture to pot with pasta. Wipe out skillet and drizzle in a little oil; roll around in skillet to coat. Add egg mixture to pasta and toss vigorously with tongs until pasta is evenly coated. Add capers and ½ cup basil and toss again to combine.
  5. Transfer pasta mixture to skillet and press gently into an even layer. Top with remaining Parmesan, a few whole basil leaves, and an extra sprinkle of red pepper flakes.
  6. Bake pasta until surface is nicely browned, 30–35 minutes. Let cool 10 minutes before cutting into wedges for serving.

Notes:
Ugh, I wanted to like this dish SO BADLY but it would need some doctoring if I were to make it again.
I only had a 10and 1/2 inch cast iron skillet, and when I piled in the veggies to roast, It overflowed, so I split them up into two dishes. I used 1 and 1/2 cups tomatoes (though that was probably mistake, should have used the whole amount), and I used parmigiana grana padano blend instead of straight parm. Otherwise I followed the recipe to a Tee. It turned out visually cool, but dry. Definitely needed some extra sauce. The spaghetti on the bottom of the pan got a little over charred but I kind of liked the crunch. It would need double the sauce — maybe an extra egg and tablespoon of tomato paste, and more cheese for me to consider making this again.
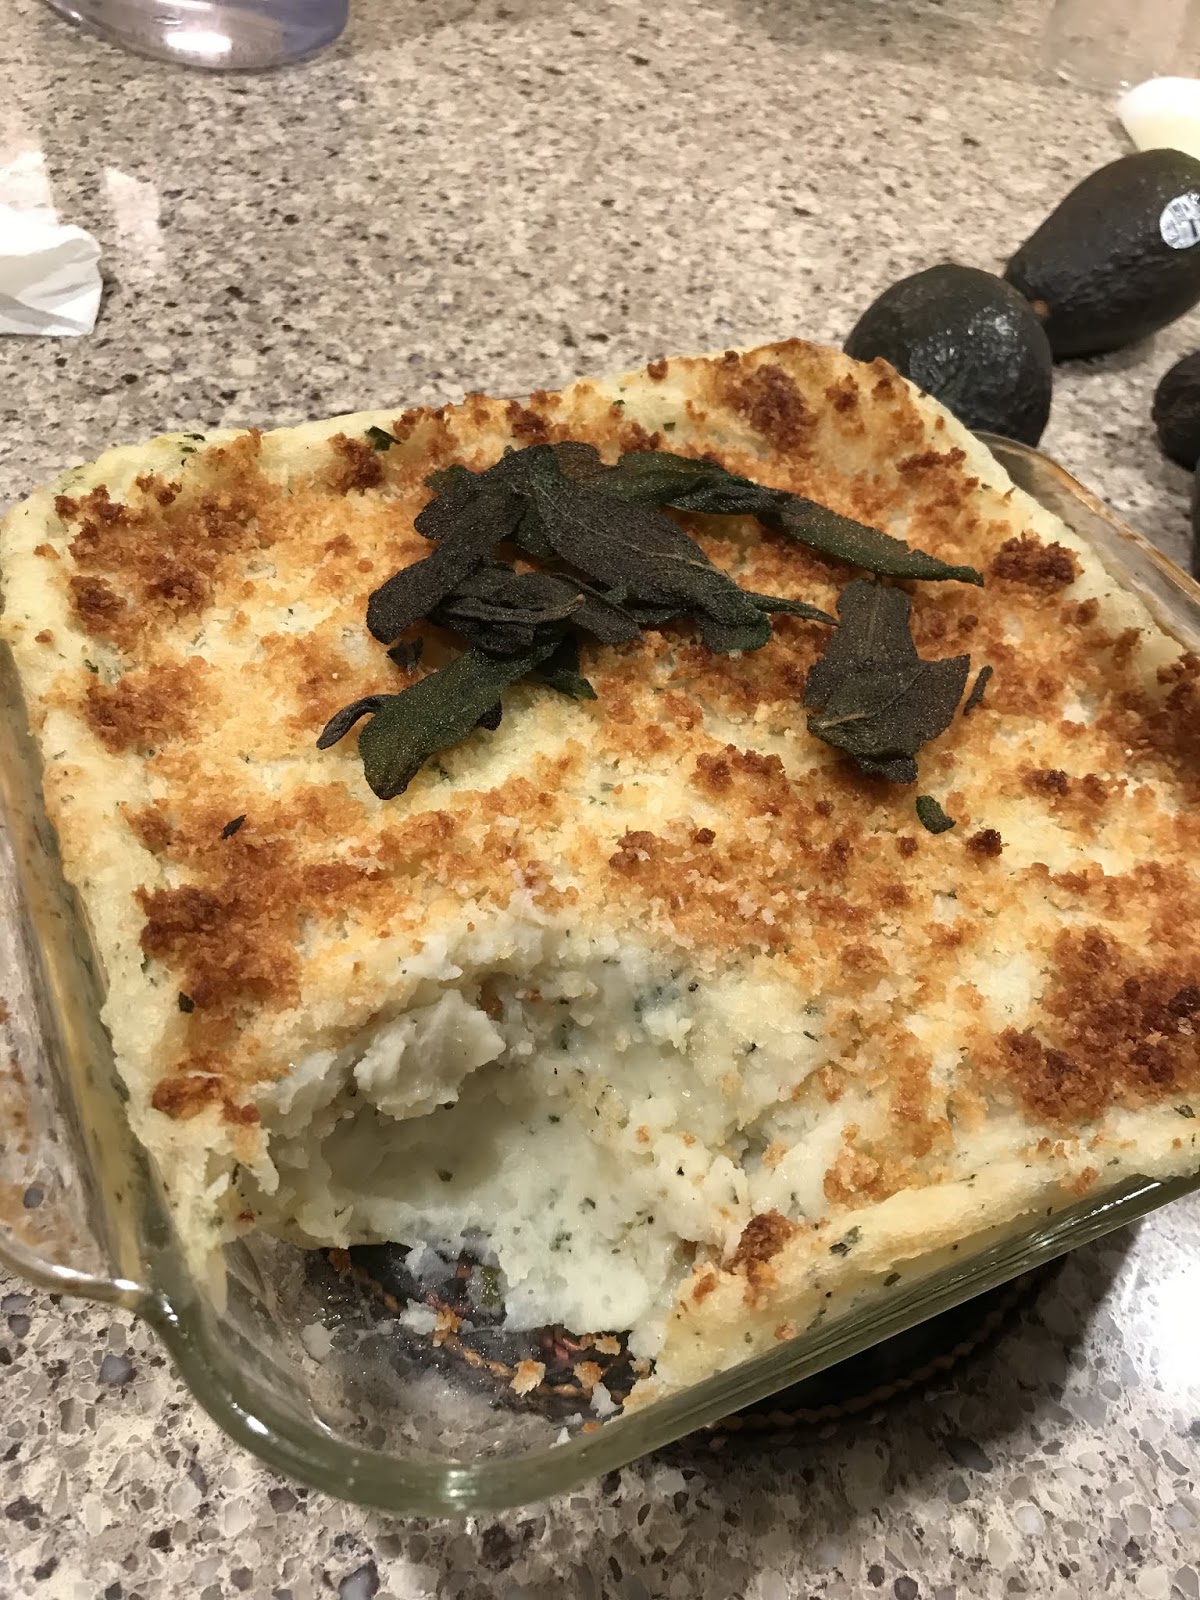
Picture:


Saturday, December 8, 2018

Middle Eastern Savoy Cabbage Salad

Saved this recipe an old finecooking magazine, and we had leftover cabbage from Thanksgiving, so decided to make it. Savoy cabbage has crinkly leaves perfect for soaking up a thick dressing and still remains crunchy.

Recipe:

From finecooking
https://www.finecooking.com/recipe/middle-eastern-savoy-cabbage-salad

1 day ahead and refrigerated, covered. Servings: 4 to 6Middle Eastern ingredients like lemon, yogurt, cumin, and coriander flavor a creamy dressing that crinkly Savoy cabbage soaks right up. It’s a lovely accompaniment to grilled lamb. Use regular yogurt for the dressing; Greek yogurt is too thick. If you have extra dressing, use it as a dip for vegetables or to dress another small salad.
  • 1/2 small red onion, halved and thinly sliced
  • 1 Tbs. extra-virgin olive oil
  • 1 tsp. ground cumin
  • 1 tsp. ground coriander
  • 2 Tbs. fresh lemon juice
  • 1 Tbs. finely grated lemon zest
  • 2 tsp. honey
  • Kosher salt
  • 1 cup plain whole-milk yogurt (not Greek)
  • 1 small head Savoy cabbage, halved, cored, and sliced crosswise into 1/4-inch-thick ribbons (12 loosely packed cups)
  • 2 medium carrots, peeled and shaved into ribbons with the peeler (about 2 lightly packed cups)
  • 1/2 cup chopped fresh mint
  • 1/4 cup chopped salted pistachios
  • Freshly ground black pepper

  • Soak the onion in cold water to mellow it, about 20 minutes. Drain.
  • In an 8-inch skillet, heat the oil, cumin, and coriander over medium-low heat until the spices are fragrant, about 2 minutes. Let cool completely.
  • Add the lemon juice and zest, honey, and 1/2 tsp. salt to the spices in the pan and stir to combine. With a silicone spatula, fold in the yogurt until well combined.
  • Put the cabbage, carrots, mint, and onion in a large serving bowl. Toss the salad with about two-thirds of the dressing. Let sit for about 10 minutes to soften the cabbage. Sprinkle the chopped pistachios over the salad. Grind some black pepper over the top and then drizzle with more dressing to taste. Season to taste with additional salt and pepper, and serve

Notes:

I used homemade 2% yogurt and it worked fine. I liked the dressing! This salad holds up well and tasted pretty great the following day as well. The mint is key. You could probably add lentils to make it more hearty. Any hard nut (like almonds) would probably work too. Regular green or red cabbage would probably work for this as well.


Pictures

breakfast Cookies with Dates

Ever in pursuit of healthy, on-the-go breakfast options for the DH, I stumbled across the recipe when I went down a bit of a foodblog rabbithole, and thought it would be excellent. Sweetness comes from the dates, and it has a lot of oats and seeds for fiber and fullness.

Recipe:
Directly from blog occasionally oats: 

Ingredients

  • 220 grams / 2 cups rolled oats divided
  • 110 grams / 3/4 cup raw sunflower seedsdivided
  • 60 grams / 1/4 cup raisins
  • 50 grams / 1/4 cup chia
  • 40 grams / 1/4 cup pepitas
  • 1 teaspoon cinnamon
  • 1/2 teaspoon sea salt
  • 1/2 teaspoon baking soda
  • 120 grams / 1/2 cup dates*
  • 70 grams / 1/4 cup coconut oil
  • 60 ml / 1/4 cup oat milk or another non-dairy milk

Instructions

  1. Preheat the oven to 180C / 350F and grease or line a large baking sheet.
  2. Place 110 grams / 1 cup of the oats and 70 grams / 1/2 cup of the sunflower seeds into the bowl of a food processor fitted with the blade attachment. Mix on high for a minute or two, until a coarse flour forms. Place the flour into a large bowl and stir in the remaining oats, sunflower seeds, raisins, chia, pepitas, cinnamon, salt, and baking soda.
  3. Blend the dates, coconut oil, and milk in the food processor until the dates have broken down and a paste forms. Add this to the oat mixture and use your hands to mix until fully combined.
  4. Form large balls with the dough, each about a heaping 1/4 cup in size. Press them with your hands to flatten to about 3cm high and place onto the prepared baking sheet. Repeat until all of the dough has been used, and then bake for 13-15 minutes or until the edges of the cookies are golden.
  5. Remove from the oven and cool for about ten minutes on the baking sheet before removing and cooling fully on a rack. They'll be a little fragile until they're completely cool. Store in a sealed container on the counter for up to three days** or freeze.

My Notes:

I pretty much followed the recipe exactly. I added a 1/2 tsp more cinnamon (probably, I’m terrible about measuring spices), and used kosher instead of sea salt. I used the weights for everything (even the coconut oil and dates, which I thought ended up being more in quantity than the volume listed. I used almond milk and put a splash or two more to get the date paste runnier. Because it was a cold day, the coconut oil was solid, so heating the milk before adding it into the food processor helped melt the oil. I used half dried cranberries and half raisins. I probably would press the cookies down further— they didn’t really spread for me. Made 10 cookies.

I liked the cookies! Just the right hint of sweetness. Lots of chewing required but would be excellent with coffee, I can tell. Definitely would make again. 

Pictures

Tuesday, December 4, 2018

Crumb topped pumpkin loaf

I have had this recipe for ages (9 years!) and finally, finally have come around to making it.

Recipe from Family Circle Magazine, October 2009 (https://www.familycircle.com/recipe/quickbreads/crumb-topped-loaf/)

Ingredients:
Loaf:
Topping:
Directions

  1. Heat oven to 350 degrees. Coat a 9x5x3-inch loaf pan with nonstick cooking spray.
  1. Mix flour, baking powder, pie spice and salt in small bowl. Beat egg and sugar in large bowl. Beat in pumpkin, oil and vanilla until smooth. Make a well in center of flour mixture. Add egg mixture. Stir just until moistened and batter comes together. Fold in walnuts. Spoon batter into prepared pan.

  1. Mix butter, brown sugar and flour in small bowl until crumbly. Stir in walnuts. Sprinkle over batter.
  1. Bake loaf at 350 degrees for 50 to 55 minutes, until wooden toothpick tests clean. Cool in pan on rack 10 minutes. Turn out onto rack to cool completely. Dust with confectioners' sugar; slice.

Nutrition Information for Crumb-Topped LoafServings Per Recipe: 12Per Serving: 28 mg chol., 4 g sat. fat, 2 g fiber, 105 mg sodium, 31 g carb., 14 g Fat, total, 259 kcal cal., 4 g pro.


My notes:
I used Libby's canned pumpkin-- not sure if that is considered "solid pack" pumpkin, but it worked. I did about one heaping cup.
I added the dry ingredients into the wet ingredients, and not vice versa.
It didn't seem like a lot of batter, but there's quite a bit of topping that the 9 X 5 X 3 pan was necessary so that the topping didn't overflow. However, I'd consider a smaller loaf pan just so that the loaf doesn't come out so squat and short.
I baked it for 50 minutes, it seemed dry. Next time I'd start checking at 45 minutes.
I used my own spice blend and added cinnamon, cardamom, ground ginger, cloves, and nutmeg. I probably doubled the overall amount of spice.
I added a pinch of salt to the crumb topping.
Overall the recipe comes together easily and tastes good-- the topping is the highlight, really. I probably won't make again because I'd want more bread to topping ratio. I might just make the topping again for another recipe.


Pictures


Saturday, November 17, 2018

Creamy Mashed Potato Casserole with Sage and Fontina

I wanted to test this recipe before suggesting it for Thanksgiving. It’s been in my cooking folder for ages, and so I just went for it, especially because it uses sage and I had some sitting in the fridge.

Recipe from (https://www.foodandwine.com/recipes/mashed-potato-casserole-sage-and-fontina)

Ingredients

  • 6 tablespoons unsalted butter, at room temperature, plus more for greasing
  • 3 pounds baking potatoes, peeled and cut into 2-inch pieces
  • 1/2 cup crème fraîche (4 ounces)
  • 2 tablespoons chopped parsley
  • 1 tablespoon chopped sage plus 12 sage leaves
  • 8 ounces imported Fontina cheese, shredded
  • Kosher salt
  • Pepper
  • 1/3 cup plain dry breadcrumbs
  • 1/3 cup freshly grated Parmigiano-Reggiano cheese
  • Olive oil, for frying
How to Make It:
Step 1 Preheat the oven to 400°. Lightly grease a 2- quart shallow baking dish. In a large saucepan, combine the potatoes with enough water to cover by 2 inches. Bring to a boil and cook until fork-tender, 15 to 20 minutes. Drain well and transfer to a large bowl. Mash the potatoes with 4 tablespoons of the butter, the crème fraîche, parsley and chopped sage. Fold in the Fontina and season with salt and pepper. Spread the potato mixture in the prepared dish in an even layer.

Step 2 In a small bowl, using your fingers, blend the remaining 2 tablespoons of butter with the breadcrumbs and Parmesan until coarse crumbs form. Top the potatoes with the breadcrumb mixture. Bake for about 30 minutes, until golden and crisp on top.

Step 3 Meanwhile, in a small skillet, heat 1/4 inch of olive oil over low heat. Add the sage leaves and cook, stirring occasionally, until crisp, about 3 minutes. Transfer the sage to paper towels to drain. Scatter the fried sage over the casserole and serve.

Make Ahead The assembled unbaked casserole can be refrigerated overnight.


My notes:
It was good, but not great. I liked the sage, creme fraiche, parsley, and fontina in the mashed potato, but it probably could’ve used more butter. I also liked the crispy breadcrumb topping, which browned nicely. But overall, though this dish would feed a crowd, it wasn’t rich enough for Thanksgiving. I think if I’d added more cheese, butter, and salt honestly, it would’ve been excellent. However, I doubt I’ll make this recipe again for just two people.


Pictures


Blackberry Tahini Yogurt Cake

Introduction:

We had a lot of whole milk yogurt sitting in the fridge past the expiration date, and I decided to make this cake! I’ve been seeing a lot of tahini in desserts lately and frankly I’m not sure I love the trend, but I’m game to try it out a couple times.


Recipe

INGREDIENTS

  • Nonstick vegetable oil spray
  • ½ teaspoon ground cardamom or cinnamon
  • 4 tablespoons plus 1 cup sugar
  • 2¼ cups all-purpose flour
  • 2 teaspoons baking powder
  • ½ teaspoon kosher salt, plus more
  • 2 large eggs
  • 1 cup plain whole-milk yogurt
  • ½ cup vegetable oil
  • 2 teaspoons finely grated lemon, lime, or orange zest
  • 2 cups fresh (or frozen, thawed) blackberries
  • ¼ cup tahini

RECIPE PREPARATION

  • Preheat oven to 350°. Lightly coat a 9"-diameter cake pan with nonstick spray; line bottom with a parchment paper round. Lightly coat parchment with nonstick spray. Mix cardamom and 2 Tbsp. sugar in a small bowl; set aside.
  • Whisk flour, baking powder, 1 cup sugar, and ½ tsp. salt in a large bowl. Make a well in the center; add eggs, yogurt, oil, and citrus zest and whisk to combine. Switch to a wooden spoon or rubber spatula and gradually work in dry ingredients, mixing until smooth. Fold in berries; scrape batter into prepared pan.
  • Mix tahini, a pinch of salt, and remaining 2 Tbsp. sugar in another small bowl. Drizzle evenly over batter; sprinkle reserved cardamom sugar over top.
  • Bake cake until a tester inserted into the center comes out clean, 50–60 minutes. Transfer to a wire rack; let cool in pan. Invert onto a plate, then turn right side up.
  • Do Ahead: Cake can be baked 2 days ahead. Store tightly covered at room temperature.
My notes:
I followed the recipe to the tee. I used ground cardamom, and fresh blackberries. The cake came together very quickly! I placed the cake pan on a cookie sheet and I’m glad I did because there was a very small amount of spillover.

I would not make the cake as is again, but I would totally do one of the “riffs”. I’d either use cinnamon instead of cardomom or do half and half. All cardamom had a slight bitter taste to it that I didn’t like. I’d also try almond butter instead of tahini. The tahini and cardamom combo wasn’t my favorite but I could see almond and cinnamon going together smashingly with the lemon scented cake. This could easily be make with blueberries as well. The cake was springy and soft and took about 53 minutes to bake in the oven. Visually, the cake doesn’t look that amazing— maybe my tahini mix was too thin and it spread funny? I’d consider some turbinado or powdered sugar to make it look better--maybe even a crumb topping, coffee cake style. The cake stayed moist for 3-4 days at room temperature.


Picture


Wednesday, November 7, 2018

Tofu Nut Balls

Recipe: directly copied from in pursuit of more blog
http://inpursuitofmore.com/2018/03/26/tofu-nut-balls/

and she cites the recipe as inspired by the Moosewood cookbook.

Tofu Nut Balls

~ from the Moosewood Cookbook
1/2 cup uncooked short grain brown rice
1 cup water
2 tbsp soy sauce
250g firm tofu, mashed
1/2 cup ground almonds
1/2 cup fine breadcrumbs
1/2 tsp salt
a little oil for the baking sheet or frying pan
Place the rice and water in a small saucepan. Bring to a boil, cover, and lower the heat to the lowest possible simmer. Cook until very soft (mushy even) for about 35 to 45 minutes.
You get to choose between sautéing the balls or baking them. If you are baking them, preheat the over to 350ºF and lightly oil a baking sheet. If you are sautéeing, have ready a skillet and a little oil. Place the soy sauce and half the mashed tofu in a blender or food processor, and add about 3/4 of the cooked rice. Blend to a thick paste. Place the remaining tofu in a medium-sized bowl. add the blended mixture, along with the almonds, bread crumbs, salt, and remaining rice. Taste to see if it needs more salt. Using your hands, form the batter into 1-inch balls.
To cook, you can either sauté them in a little hot oil for about 15 minutes OR bake them on a lightly oiled tray for 30 minutes at 350-375 degrees. Serve hot, with your choice of sauce or condiment. These are great cold too! Crumble leftovers onto a green salad or smoosh them in a sandwich.


My notes:
I pressure cooked the short grain brown rice
I ground the almonds up in a food processor-- I bet almond meal would work well here too.
I also ground the breadcrumbs up myself from old bread.
I baked most of them and fried a few. These are delicious fried-- baked is okay.
I think these have great potential to be spiced up a bit more-- flavored tofu, or chili sauce, or herbs. I think I'd toy with the seasoning next time I make it.

Spicy Molasses Cookies

 So I’m renewing my effort to cook my way through all the recipes I’ve saved over the years. This one I saved because I’m always looking for gingery-molasses cookies that have a kick to them, and I’m happy to report that these do!


Recipe (from Bon Apetit)

INGREDIENTS

1¼ cups all-purpose flour

½ cup whole wheat flour

1 teaspoon baking soda

1 teaspoon kosher salt

2 teaspoons ground ginger

1½ teaspoons ground cinnamon

½ teaspoon ground cloves

1½ teaspoons finely ground black pepper, plus more for sprinkling

1 cup (packed) dark brown sugar

½ cup (1 stick) unsalted butter, room temperature

1 large egg, room temperature

⅓ cup plus 1 Tbsp. mild-flavored (light) molasses

¾ cup powdered sugar

1 tablespoon (or more) milk

Raw sugar (for sprinkling)

PREPARATION


Whisk all-purpose flour, whole wheat flour, baking soda, salt, ginger, cinnamon, cloves, and 1½ tsp. pepper in a medium bowl to combine.

Using an electric mixer on medium speed,beat brown sugar and butter in a large bowl until light and fluffy, about 3 minutes. Add egg and beat to incorporate. Add ⅓ cup molasses and mix just to combine. Reduce mixer speed to low and gradually add dry ingredients; beat just until incorporated. Pat dough together and wrap in plastic. Chill until firm, about 1 hour.

Place racks in upper and lower thirds of oven; preheat to 350°. Scoop out level tablespoonfuls of dough and roll between the palms of your hands into smooth balls. Place on 2 parchment-lined baking sheets, spacing about 2" apart (you should be able to fit about 12 on each sheet).

Bake cookies, rotating baking sheets top to bottom and back to front halfway through, until just firm around the edges, 9–12 minutes (if you like chewier cookies, bake less, and if a crispier cookie is your thing, bake a little longer). Let cookies cool about 5 minutes on baking sheets, then transfer to wire racks and let cool completely.

Repeat with remaining dough, using fresh parchment paper on baking sheets, as dough is quite sticky.

Whisk powdered sugar, milk, and remaining 1 Tbsp. molasses in a medium bowl until smooth. The glaze should be very thick and glossy but still pourable. If needed, add more milk or water ½-teaspoonful at a time until you get to the right consistency. Drizzle glaze over cookies and sprinkle with raw sugar and more pepper.

Do Ahead: Cookies can be baked and glazed 2 days ahead. Once glaze is set, store airtight at room temperature, or freeze unglazed cookies up to 1 month in resealable plastic bags.


My notes:

I used ground white pepper in place of ground black pepper, mostly because all I have is coursely ground black pepper. I also freshly ground my cloves, and probably erred on the side of extra spice overall.
The dough was quite soft and sticky after being mixed (before the chill), and though the chill helped make it easier to manage, it quickly melted as I handled it.
So naturally it follows that these cookies spread quite a bit in the oven.
I rolled the dough into .5 oz balls, which spread to 3 inch cookies. I really liked this size.
At the 9 minute bake mark, the cookies were crispy on the outside and chewy in the center. Perfect.
These cookies are great unglazed, but need the glaze to look visually appealing. The glaze came together easily and was an orange-y color.
These had a kick! I ate way too many in one setting though, and my mouth became a little numb from all the pepper. 


My pics:


The verdict: I'd totally make these again, as is, or reducing the pepper a bit, just to make them more of a crowd pleaser. I would also consider sneaking in more ginger.


Broccoli Cheddar Soup

I made the broccoli Cheddar Soup from Smitten Kitchen since I basically had all the ingredients lying around.

Recipe: Directly copied from Smitten Kitchen
(https://smittenkitchen.com/2015/09/broccoli-cheddar-soup/)

Broccoli Cheddar Soup

  • Servings: 4 to 6
Instead of 1 cup half-and-half, you could use 1/2 cup milk + 1/2 cup heavy cream, 1/2 cup heavy cream + 1/2 cup additional stock or broth. I like to use both broccoli florets and stems when I cook, and I find that the stems cook up with the best texture and at the same rate as the florets when I peel them first. I did so here.
  • 4 tablespoons unsalted butter
  • 1 small onion, chopped small
  • 1 garlic clove, minced
  • 1/4 cup all-purpose flour
  • 1 cup half-and-half
  • 4 cups low-sodium vegetable broth
  • 1 bay leaf
  • Kosher salt and freshly ground pepper
  • 1 1/4 pounds broccoli or 4 cups broccoli florets and stems, chopped small
  • 1 large carrot (about 6 ounces) or 2 slim ones, chopped tiny (1 cup)
  • 8 ounces (about 2 1/2 cups) coarsely grated sharp cheddar cheese, plus a pinch extra for garnish

Melt the butter in a large, heavy pot over medium heat. Add the onion and garlic and cook until tender, about 3 to 5 minutes. Stir in the flour and cook until golden, 3 to 4 minutes, then gradually whisk in the half-and-half until smooth. Add the chicken broth, bay leaf, salt and pepper and bring to a simmer. Reduce the heat to medium-low and cook, uncovered, stirring occasionally, until slightly thickened, about 10 minutes. Add the broccoli and carrot to the broth mixture and simmer until tender, about 15 to 20 minutes. Discard the bay leaf and adjust seasoning if needed, but err on the cautious side with the salt because the cheese will add a bit. Puree the soup to your desired texture — I like mine fairly chunky, just lightly blended — with an immersion blender or in an upright one. Back on the stove, add cheese and whisk until melted, about 1 minute.
Serve in bowls, garnished with a pinch of cheese. We like a hearty slice of grainy toasted bread on the side, for swiping.


My notes: 
I used 12 oz broccoli florets (from a TJ's bag), and then probably 10 oz mushrooms. I pan fried the mushrooms and added half to the soup after the blend but before the addition of the cheese, and used the rest to top the soup.
I used a red onion, and 4-5 cloves of garlic. I also added sliced green onions with the broth.
Instead of half and half, I used 3/4 cup of 2% milk and 1/2 cup-ish of light sour cream.
I used both white and yellow sharp cheddar cheese.
I also added celery seed and some nutmeg as I adjusted the spices.

Delicious!

Scallion sour cream drop biscuits

I had green onions leftover from another recipe, and decided to make these to use some more of them up!

Recipe (from Bon Apetit)
Makes 8 Servings
Active Time: 15 min
Total Time: 30 min
All that sour cream keeps these drop biscuits super moist and tender—they reheat well, even after sitting out for hours (pop back into 350° oven for 5 minutes).

Ingredients

  • 2 cups all-purpose flour
  • 2 teaspoons baking powder
  • 2 teaspoons kosher salt
  • 1 teaspoon sugar
  • ½ teaspoon baking soda
  • ½ cup (1 stick) unsalted butter, melted, cooled, divided
  • 4 scallions, thinly sliced
  • 1½ cups sour cream
  • Hungarian hot paprika (for serving)

Recipe Preparation

  • Preheat oven to 400°. Whisk flour, baking powder, salt, sugar, and baking soda in a large bowl. Drizzle in 6 Tbsp. butter and mix lightly with your hands just to distribute butter. Make a well in center of bowl and add scallions and sour cream. Mix with a wooden spoon until no dry spots remain and mixture forms a shaggy dough.
  • Using 2 spoons, drop ½-cupfuls of dough onto a parchment-lined baking sheet, spacing at least 1½" apart, or into a 12" cast-iron skillet, arranging so sides of biscuits are just touching (you should have 8). Brush tops with remaining 2 Tbsp. butter; sprinkle with paprika. Bake biscuits until tops and bottoms are golden brown on top and bottom, 12–15 minutes.

My notes:
- Comes together really quickly
- Made 10 biscuits
- Used "light" sour cream and still worked
- Even though after 15 minutes of baking the tops were browned, the outer biscuit was still quite tender. Would consider a quick broil to get a crunchier top.
- Would also consider adding chopped green chiles or melding cheddar on top
- excellent on the retoast
- I used the green and white parts of the scallion
- Paprika and even other spices would work well. 


Made again in March 2019.
Still pretty tender, even after 17-19 minutes in oven. I tried the broil, which helped and then I transferred a few to the toaster oven to get a crunchier top. I used smoked paprika, cayenne, and red chili powder. I melted a little pecorino on top— probably wouldn’t do that again.

Made again August 2021. Delicious, honestly, as a soft tender biscuit. I used Guntur Sanaam Chili powder and I measured the sour cream in grams (360). Did not broil this time. 

Pic:

Sunday, October 14, 2018

Chocolate Chip Cookie (from vanillabeanblog)

On a mission to find a new favorite chocolate chip cookie! I tried this one from Sarah's wonderful blog:

http://www.thevanillabeanblog.com/2013/05/chocolate-chip-cookies.html

 Chocolate Chip Cookies
Depending on the size of your cookies, you can fit 6-8 cookies on a baking sheet. They will spread quite a bit, so make sure they are pretty far apart. You can cut the salt back a bit if you wish – 1/2 teaspoon will work, too. I prefer my cookies a bit underdone, and theses cookies are best that way. When you pull the pan from the oven, you want the edges to have set and be browning, but the center to still be under-baked and a bit puffy. As the center falls it creates lovely cracks and lines on the top, and settles into a gooey, blissful bite.
1/2 lb [2 sticks] butter, soft
3/4 cup brown sugar
1/2 cup sugar minus 1 tablespoon
1 egg
1 1/2 teaspoon vanilla
1 teaspoon baking soda
1 teaspoon salt (see note)
2 cups + 2 tablespoons all-purpose flour
6 ounces chopped chocolate (or 1 [heaping] cup chocolate chips)
1/4 cup cacao nibs (optional)

Preheat the oven to 350 and place an oven rack in the middle-low position.  Line two baking sheets with parchment paper. In a small bowl, whisk flour, baking soda, and salt together, and set aside. In a standing mixer, cream the butter and sugars together. Add the egg and vanilla, and mix well. Add flour mixture and mix batter until just combined. Add the chopped chocolate and mix just until the chocolate is incorporated. Use a scoop or spoons to form balls (I used a scale and made mine 1 1/2 ounces each).  Place on a baking sheet (see note) and bake the sheets one at a time. About 5 minutes into baking, rotate the pan. Bake a few more minutes, and when the sides begin to set, lift pan slightly in oven and let fall (this will help to create the lines on your cookies). Bake another 1-2 minutes, until the sides are set and golden brown. Depending on your oven, cookies will bake a total of 9-11 minutes. Remove baking pans from oven and bang lightly on counter to create more lines and set cookies. Let cookies cool on wire racks until cool.


My thoughts:
These came out beautifully. They visually look great, and are the perfect thickness. I used kosher salt and used the full teaspoon, and it was fine. I also used chocolate chips. After mixing the batter together, I had to stick it in the fridge in order to be able to roll them into balls. I left it in the fridge for just a few hours. However the DH wasn't a fan and frankly, I didn't love LOVE them either. They seemed extra butter-vanilla-y and had a vanilla cupcake feel to them. I think I prefer a higher chocolate to dough ratio. They held up pretty well for a week at room temperature. I would make them again, but not the recipe I'm looking for.