Molasses Crinkles
by Elaine Khosrova from Fine Cooking Issue 54
http://www.finecooking.com/recipes/molasses-crinkles.aspx
9 oz. (2 cups) allpurpose flour
2 tsp. baking soda
11/4 tsp. ground ginger
1 tsp. ground cinnamon
1/2 tsp. ground cloves
1/2 tsp. table salt
4 oz. (1/2 cup) unsalted butter, softened
1 cup packed dark brown sugar
2 Tbs. vegetable oil
1/3 cup molasses
1 large egg
Granulated sugar for rolling
Yields about thirty-six 3-inch cookies.
Several hours before baking:
In a medium bowl, sift together the flour, baking soda, ginger, cinnamon, cloves, and salt. With an electric mixer, beat the butter and brown
sugar until light in color and texture. Beat in the oil until blended. Scrape down the sides of the bowl, add the molasses and the egg, and beat
until blended. Stir in the flour mixture until well combined. Wrap the dough in plastic and chill until firm, about 3 hours.
To bake:
Heat the oven to 375°F. Measure the dough into tablespoonsize pieces and roll each piece between your palms to form 1inch balls. Roll the
balls in granulated sugar to coat. Put the balls 2 inches apart on lightly greased cookie sheets. Sprinkle the tops with more sugar and bake
until the center surface of the cookies is barely dry, 9 to 10 minutes (don’t overbake). Let cool on the sheets for 5 minutes; transfer to a wire
rack to cool completely.
MY NOTES:
Saturday, December 19, 2015
Chocolate Crinkle Cookies
Chocolate Crinkles Cookies
from Cook's Illustrated
https://www.cooksillustrated.com/recipes/8125-chocolate-crinkle-cookies
INGREDIENTS:
MY NOTES:
1. Even after I let the dough rest longer than 10 minutes on the counter it was still pretty sticky-- it did better with a little time in the fridge, but overnight might be better next time.
2. I did not use any instant espresso powder. I used Dutch processed cocoa powder.
3. I really did like the effect of the granulated sugar + the powdered sugar-- it really did make for a beautiful cookie.
4. I used an electric mixer to mix up the egg mixture, but I did fold in the chocolate mixture and the flour mixture in-- not sure if it was necessary or not, but it really made it fast :)
PICTURES:
from Cook's Illustrated
https://www.cooksillustrated.com/recipes/8125-chocolate-crinkle-cookies
INGREDIENTS:
1 cup (5 ounces) all-purpose flour
½ cup (1 ½ ounces) unsweetened cocoa powder (either natural or Dutch processed is fine)
1 teaspoon baking powder
¼ teaspoon baking soda
½ teaspoon salt
3 large eggs
4 teaspoons instant espresso
powder (optional)
1 teaspoon vanilla extract
4 ounces unsweetened chocolate, chopped
4 Tablespoons unsalted butter
½ cup (3 ½ ounces) granulated sugar
½ cup (2 ounces) confectioners' sugar
Makes 22 cookies
1. Adjust oven rack to middle position and heat oven to 325 degrees. Line 2 baking sheets with parchment paper. Whisk flour, cocoa, baking powder, baking soda, and salt together in bowl.
2. Whisk brown sugar; eggs; espresso powder, if using; and vanilla together in large bowl. Combine chocolate and butter in bowl and microwave at 50 percent power, stirring occasionally, until melted, 2 to 3 minutes.
3. Whisk chocolate mixture into egg mixture until combined. Fold in flour mixture until no dry streaks remain. Let dough sit at room temperature for 10 minutes.
4. Place granulated sugar and confectioners’ sugar in separate shallow dishes. Working with 2 tablespoons dough (or use #30 scoop) at a time, roll into balls. Drop dough balls directly into granulated sugar and roll to coat. Transfer dough balls to confectioners’ sugar and roll to coat evenly. Evenly space dough balls on prepared sheets, 11 per sheet.
5. Bake cookies, 1 sheet at a time, until puffed and cracked and edges have begun to set but centers are still soft (cookies will look raw between cracks and seem underdone), about 12 minutes, rotating sheet halfway through baking. Let cool completely on sheet before serving.
MY NOTES:
1. Even after I let the dough rest longer than 10 minutes on the counter it was still pretty sticky-- it did better with a little time in the fridge, but overnight might be better next time.
2. I did not use any instant espresso powder. I used Dutch processed cocoa powder.
3. I really did like the effect of the granulated sugar + the powdered sugar-- it really did make for a beautiful cookie.
4. I used an electric mixer to mix up the egg mixture, but I did fold in the chocolate mixture and the flour mixture in-- not sure if it was necessary or not, but it really made it fast :)
PICTURES:
Sunday, October 4, 2015
Pumpkin Pie Attempt 1 - my notes
This year, we've been asked to bring the pumpkin pie for Thanksgiving. Which of course has made me slightly anxious because pie has always been my nemesis. I've had too much failure with making pie crusts from scratch, or making them only to have them not cook in the oven or have them slightly burn or just not be tasty.
But the thing is, I love pumpkin pie, and I want to do this. So I've decided for my own sanity, I'm going to make a cookie crust.
For this attempt, I tried a graham cracker crust, and used the Trader Joe's Organic Canned Pumpkin in the Libby's recipe. I followed the Libby's recipe exactly, except for using more spices-- more cinnamon and heaping spoons of everything else.
The graham cracker recipe is from this blog and the only change that I made is that I used less sugar (more like 1/4 cup) and added two pinches of salt.
When I attempt this again, I want to try a gingersnap crust and the filling recipe on the back of the trader joe's pumpkin can (which uses heavy cream, not evaporated milk).
Some notes: Remember to cover the pan with foil so as not to have the top of the crust burn. Make sure to cool completely on the counter before letting it chill before covering because of condensation.
Sunday, September 13, 2015
Peanut Butter Honey Cookies
These cookies came from the book "Baking with Less Sugar", written by Joanna Chang, of the Flour bakeries in the Boston Area. I had heard about Flour many years ago, and had the good fortune to visit one in Cambridge last year. We had a peach dessert and it was fantastic. When I saw this book, I immediately got my hands on it because I have the same problem as Chang's husband-- I'm very sensitive to sugar. I love the stuff, too much. But I have such a problem controlling how much of it I eat and I inevitably end up high on it, and then crash later. It's not pretty. It's something I'm working on-- but moderation is an elusive concept sometimes, especially to someone who loves putzing around the kitchen as much as I do. So anyway, I had high hopes for the book. At first pass, the recipes don't necessarily seem to be super low sugar-- really, I think the book would've better been named "Baking with Less White Refined Sugar". Chang has organized the book based on sweetner-- recipes using honey, recipes using maple syrup, or just chocolate, etc. But overall there is still a sizeable amount of sugar (unrefined, but still) in the recipes. Granted, certainly less sugar than the traditional recipes, but still.
I picked this recipe to try out first because the DH was given a jar of honey from one of his attendings who owns his own apiary. I thought it might be nice to make a treat that was sweetened only with the honey to give back. However, while the recipe did come out, the honey was masked by the peanut butter so I don't think I'll be sending them along. Which is fine! More for us, and another excuse to try another recipe. :)
Nutty Fruit Seed Bars
So these bars I made last Saturday. They are from Joanna Chang's Baking with Less Sugar. I have to admit, this is the third recipe I've made from the book, and while I wasn't super impressed with the other two, this one is definitely keeper!
Ingredients
75g/ 3/4 cup of walnuts, coarsely chopped
75g/ 3/4 cup of sliced almonds
75g/ 3/4 cup pecan pieces
40g/ 1/2 cup dried apple slices, chopped
60g/ 1/2 cup dried cranberries
60g/ 1/2 cup dried apricots, diced
60g/ 1/2 cup sultanas (golden raisins)
60g/ 1/2 cup raisins
50g/ 1/2 cup almond flour
60g/ 1/2 cup buckwheat flour
100g/ 1 cup old-fashioned rolled oats (not instant or quick cooking)
40g/ 1/2 cup unsweetened shredded coconut
1 tsp kosher salt
1 tsp ground cinnamon
100g/ 1/2 cup vegetable oil, such as canola
115g/ 1/3 cup honey
1 super-ripe banana, mashed (optional)
40g/ 1/4 cup flaxseed
35g/ 1/4 sunflower seeds
50g/ 1/4 cup millet
Instructions:
1. Place a rack in the center of the oven and preheat to 350 degrees.
2. Put the walnuts, almonds, and pecans on a baking sheet and toast for 8-10 minutes, or until lightly toasted. Set aside to cool.
3. Put the dried apples, cranberries, apricots, sultanas, and raisins in a medium bowl and pour boiling water over the fruit to cover. Let sit for 30 minutes.
4. Decrease the oven temperature to 325 degrees. Line a baking sheet with parchment paper.
5. In a large bowl, combine the nuts, almond flour, buckwheat flour, oats, coconut, salt, cinnamon, vegetable oil, honey, banana (if using), flaxseed, sunflower seeds, and millet. Using a wooden spoon, stir well until thoroughly combined.
6. Drain the fruit into a medium bowl, reserving 1/4 cup (60mL) of the soaking water and discarding the rest of the liquid. Divide the fruit roughly in half, place half in a food processor or in a blender and add the reserved soaking water. Process until you have a chunky jam. Add the jam to the nut mixture along with the remaining whole fruit. Stir well to combine.
7. Press the mixture evenly on the prepared baking sheet into a rectangle about 12 by 8 inches. Using a sharp knife, cut the rectangle in half lengthwise and then cut each half into 8 pieces widthwise so that you have a total of 16 bars. Bake for 35-45 minutes or until golden brown throughout. Reduce the oven temperature to 250 degrees and continue to bake for another hour. Turn off the oven and let the bars sit in the oven until completely cool. They will get pretty dark but that is okay.
8. Remove from the oven and, using a sharp knife, recut the bars along the marks to separate (they will have joined slightly during baking). The bars can be stored in an airtight container at room temperature for up to 1 week.
My notes:
1. It's not the most appetizing thing in terms of looks, which is probably why I neglected to take pictures of it. It's delicious, though.
2. I did not use the coconut (blech) or the apple slices or the apricots. Instead I used dried mangoes and dried blueberries and I added some sesame seeds as well. I also added extra spices (allspice, more cinnamon)
3. I used a blender to make the fruit jam and needed more than the recommended 1/2 cup of soaking liquid the process. I think this made the overall mixture a little more "wet" than it should have been, because the "precut" marks I made didn't not at all stay.
4. I also totally neglected to lower the temperature to 250 degrees and bake for an hour-- but I did let the bars completely cool after the 45 minute bake. The resulting bars were moist and chewy, and crumbled. I wonder if I had followed through, would the bars have been crunchier or perhaps less crumbly?
5. The millet was a really nice addition-- it made for a nice texture punch!
Burger Buns
Pretzel Bun from Smitten Kitchen
So because I was on a veggie burger kick this weekend, of course that meant that I needed to make buns.
Naturally, the pretzel bun was on my mind. I used the first method she outlined in her post, the baking soda method, but I have to say, even though I bathed my buns for a minute on each side like her directions said to, the "pretzel" flavor was very mild and honestly, the browning was laughable. They made good chewy soft buns-- but I could have saved myself the grief (and baking soda!) by skipping the bath. I doubt that my curiosity will lead me to buy food-grade lye to really get the "pretzel" flavor, but you never know.
Pics:


1. I used the technique of not adding too much flour to start and I have to say that I like it! I think in total I must have used around 3 cups of whole wheat flour in all.
2. These didn't poof much. The yeast packet I used was perhaps not the freshest, so maybe that's why? I also let them rise in the bowl I mixed it together in (instead of using a clean, oiled bowl, like I usually would).
3. Overall, I like these, and I'd make them again :)

So because I was on a veggie burger kick this weekend, of course that meant that I needed to make buns.
Naturally, the pretzel bun was on my mind. I used the first method she outlined in her post, the baking soda method, but I have to say, even though I bathed my buns for a minute on each side like her directions said to, the "pretzel" flavor was very mild and honestly, the browning was laughable. They made good chewy soft buns-- but I could have saved myself the grief (and baking soda!) by skipping the bath. I doubt that my curiosity will lead me to buy food-grade lye to really get the "pretzel" flavor, but you never know.
Pics:


Honey Whole Wheat Hamburger Buns
http://www.theprairiehomestead.com/2014/03/whole-wheat-bun-recipe.html
Ingredients
- 1 cup milk
- 1/4 cup butter or coconut oil (If using coconut oil, select the refined kind that doesn't taste like coconuts)
- 1/4 cup honey
- 1 egg
- 1 teaspoon salt
- 2 1/2 teaspoons yeast (or one packet)
- 2 to 3.5 cups of whole wheat flour (see note below)
- Sesame seeds or rolled oats (optional--for garnish)
Instructions
- In a small saucepan, gently heat the honey, butter, and milk over low heat until the butter is just slightly melted. Don't boil or simmer this mixture-- you want it just barely warm.
- Place the yeast in a mixing bowl.
- Mix the lukewarm honey/milk mixture into the yeast and stir well. Add the egg and salt. Gradually add in the flour, mixing and kneading as you go.
- Once the dough gets to the point where it is forming a ball, I let it rest for 2-3 minutes. The whole wheat flour tends to soak up liquid over time, so giving it a few minutes allows the flour to soak up liquid and helps to prevent you from adding too much. After this resting period is complete, I go back in and add more flour if needed.
- Knead 6-7 minutes, adding flour as needed. Cover the dough ball and allow it to rise in a warm place for one hour.
- Punch down the risen dough and divide it into 8 portions (12 if you like smaller buns). Roll each portion into a ball, then flatten it.
- I flatten mine so they are pretty close to the size I want my finished buns to be-- during the rising process, they will mostly rise up, not out.
- Cover the dough circles and allow them to rise 30 minutes in a warm place.
- Bake at 375 degrees in a preheated oven for 12-18 minutes.
- A minute or two before they come out of the oven, you can brush them with melted butter and sprinkle on some sesame seeds or rolled oats. This isn't necessary, but definitely makes for a pretty end product.
- These buns are best if served on the same day they are made.
1. I used the technique of not adding too much flour to start and I have to say that I like it! I think in total I must have used around 3 cups of whole wheat flour in all.
2. These didn't poof much. The yeast packet I used was perhaps not the freshest, so maybe that's why? I also let them rise in the bowl I mixed it together in (instead of using a clean, oiled bowl, like I usually would).
3. Overall, I like these, and I'd make them again :)

Friday, September 11, 2015
NYTimes Ultimate Veggie Burger
Labor weekend with no plans to get out of the city makes this wife very sad. The DH was working, and I was not. No barbeque plans, and soaring temperatures outside in the city kept me firmly indoors. Beets and cotija cheese in the fridge meant that it was finally time for the NYTimes Ultimate Veggie Burger recipe.
Ultimate Veggie Burger
by Melissa Clark (NYTimes)
Makes 6 burgers
My Notes:
1. I pretty much followed this recipe to the T. I pressed the tofu overnight, I bought green onions, and I measured and weighed and roasted everything. I did use regular breadcrumbs instead of panko breadcrumbs because I doubted it would make a difference. I also added a finely chopped green chile because it just didn't seem spiced enough.
2. I didn't have tamari almonds so I made my own (only the 3/4 cup I needed) using the recipe from thenakedkitchen blog:
Ingredients:
3. I did not grill these, but 5 minutes on each side on a cast iron pan seemed to do the trick.
4. Verdict. It was work, and procuring some of the ingredients was complicated (e.g., getting the DH to bring home mayonnaise from the food court of his office) but in the end it was a delicious burger that skirted every veggie burger pitfall-- mushiness, crumbliness, blandness, dryness-- and stuck the landing. Would definitely make again, if ever the stars were to align this way in the future.


Ultimate Veggie Burger
by Melissa Clark (NYTimes)
Makes 6 burgers
- TOTAL TIME
- 1 1/2 hours, plus at least 2 hours to chill
Ingredients
- 4 ounces extra-firm tofu, drained
- Olive oil
- 1/2 pound cremini mushrooms, trimmed and sliced
- 3/4 teaspoon kosher salt, more as needed
- Black pepper, as needed
- 1 (15-ounce) can kidney beans, drained
- 1 medium beet, peeled and coarsely grated (3/4 cup)
- 3/4 cup tamari almonds or cashews
- 1/3 cup panko bread crumbs
- 2 ounces Cotija cheese or queso blanco, crumbled or grated (about 1/2 cup)
- 2 large eggs
- 2 tablespoons mayonnaise
- 2 scallions, sliced
- 3 garlic cloves, finely chopped
- 3/4 teaspoon dulce pimentón or sweet smoked paprika
- 4 ounces tempeh, crumbled
- 1/2 cup cooked brown rice
Preparation
- 1.
- Heat oven to 425 degrees. Slice tofu into 1/4-inch-thick slabs and pat dry with paper towel. Arrange tofu on one half of a rimmed baking sheet; brush both sides with oil. Spread mushrooms on the other half of the baking sheet; toss with 2 tablespoons oil and salt and pepper.
- 2.
- On a second rimmed baking sheet, toss beans and grated beet with 1 tablespoon oil and salt and pepper, then spread the mixture into one layer.
- 3.
- Transfer both baking sheets to the oven. Roast bean-beet mixture, tossing occasionally, until beans begin to split and beets are tender and golden, about 15 minutes. Roast mushrooms and tofu until golden and most of the liquid has evaporated, about 25 minutes. Let everything cool.
- 4.
- Place nuts in a food processor and pulse until coarsely ground. Add cooled bean-beet mixture, mushrooms, tofu, panko, cheese, eggs, mayonnaise, scallion, garlic, pimentón and 3/4 teaspoon salt. Pulse until ingredients are just combined. Pulse in tempeh and rice but do not overprocess. You want small chunks, not a smooth mixture. Scrape mixture into a bowl and chill at least 2 hours or up to 5 days (you can also freeze the burger mix).
- 5.
- When you are ready to make the burgers, divide mixture into 6 equal portions and form each portion into a patty about 1 inch thick. Return to the fridge until just before grilling. They grill better when they start out cold.
- 6.
- Heat the grill. Cook the burgers over a low fire until they are charred on both sides and firm when you press on them, 4 to 6 minutes per side. If they start to burn before they firm up, move them to the sides of the grill to finish cooking over indirect heat. Alternatively, you can cook these on a grill pan or in a skillet over low heat.
My Notes:
1. I pretty much followed this recipe to the T. I pressed the tofu overnight, I bought green onions, and I measured and weighed and roasted everything. I did use regular breadcrumbs instead of panko breadcrumbs because I doubted it would make a difference. I also added a finely chopped green chile because it just didn't seem spiced enough.
2. I didn't have tamari almonds so I made my own (only the 3/4 cup I needed) using the recipe from thenakedkitchen blog:
Ingredients:
- 3 cups raw almonds
- 1/3 cup low sodium tamari (if you follow a gluten free diet be sure to use a gluten free sauce)
- Preheat oven to 300 degrees. Line a baking sheet with parchment paper for easy clean up.
- Spread the raw almonds in a single layer on the baking sheet.
- Bake approximately 10 minutes stirring occasionally or until you smell a nice nutty aroma but not browning the nuts.
- Remove to a heat proof bowl and pour the tamari over the nuts. Stir to coat.
- Let sit 5-10 minutes, stirring occasionally.
- Transfer the nuts back to the baking sheet with a slotted spoon. Spread in an even layer.
- Place the baking sheet back in the oven and bake, stirring occasionally for 15-18 minutes or until dry and nicely browned.
- Cool completely before storing in an airtight container.
3. I did not grill these, but 5 minutes on each side on a cast iron pan seemed to do the trick.
4. Verdict. It was work, and procuring some of the ingredients was complicated (e.g., getting the DH to bring home mayonnaise from the food court of his office) but in the end it was a delicious burger that skirted every veggie burger pitfall-- mushiness, crumbliness, blandness, dryness-- and stuck the landing. Would definitely make again, if ever the stars were to align this way in the future.


Tuesday, August 25, 2015
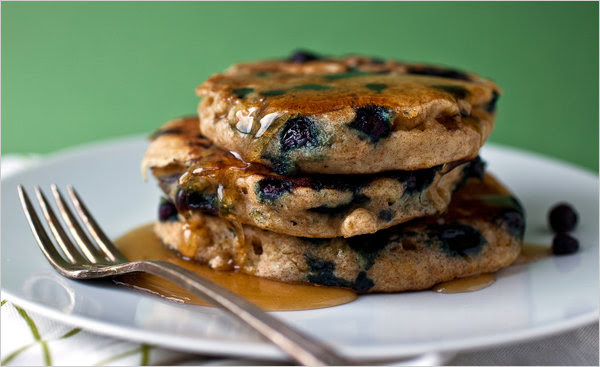
Buttermilk Pancakes with Quinoa
So these I made last weekend because of the extra buttermilk we had on hand from the biscuit experiment. I saved them from the NYTimes series written by Martha Rose Shulman. I liked them, and I'd agree that the quinoa adds height to the pancake nicely. However I don't think I'd necessarily go out of my way to make quinoa just for this recipe. Also, they are quite whole-wheaty, and that's not a bad thing, but it's a hard sell for the DH. The picture below is not mine. I wish it were. I have forgotten the photographer's name-- perhaps Andrew Scrivani? Not sure.
Quinoa Pancakes
By MARTHA ROSE SHULMAN
The addition of cooked quinoa to my regular buttermilk pancake batter results in a thick, moist pancake that’s hefty but not heavy.
1 cup whole-wheat flour
1/2 cup unbleached all-purpose flour
2 teaspoons baking powder
1 teaspoon baking soda
1 tablespoon sugar
1/8 teaspoon salt
2 large eggs
1 1/2 cups buttermilk
1 teaspoon vanilla extract
3 tablespoons canola oil
1 1/2 cups fresh or frozen blueberries or other fruit, like sliced bananas, strawberries or raisins (optional)
1. Sift together the flours, baking powder, baking soda, sugar and salt.
2. In another bowl, whisk the eggs. Add the buttermilk and whisk together, then whisk in the vanilla extract and the oil.
3. Add the flour mixture to the wet ingredients, and quickly whisk together. Do not overbeat; a few lumps are fine. Fold in the quinoa.
4. Heat a griddle over medium-hot heat. If necessary, brush with butter or oil. Drop 3 to 4 tablespoons onto the hot griddle. Place six to eight blueberries (or several slices of banana or strawberries) on each pancake. Cook until bubbles begin to break through, two to three minutes. Turn and cook on the other side for about a minute or until nicely browned. Remove from the heat, and continue cooking until all of the batter is used up.
5. Serve hot with butter and maple syrup.
Advance preparation: These pancakes freeze well and can be made a day ahead, refrigerated and reheated.
Nutritional information per pancake: 105 calories; 1 gram saturated fat; 1 gram polyunsaturated fat; 2 grams monounsaturated fat; 26 milligrams cholesterol; 14 gramscarbohydrates; 1 gram dietary fiber; 192 milligrams sodium; 4 grams protein
Pecan, Oat, and Dark Chocolate-Chunk Cookies
So I have a friend and a co-worker who is gluten-free and dairy-free, which sometimes inspires me to save recipes that I would normally overlook, and make things that I usually wouldn't make. Like these cookies, which I ripped out of a Martha Stewart Living magazine thinking, "Meh. Olive oil? Hmm... Maybe I'll try it." And so when it was time to make something for a pool party, I thought, why not?
Pecan, Oat, and Dark Chocolate-Chunk Cookies
Active Time: 30 minutes
Total Time: 1 hour 10 minutes
Makes: 20
4 cups pecans, chopped
2 cups old fashioned rolled oats
1 1/2 tsp baking powder
1 tsp coarse salt
1 tsp cornstarch
1/2 cup extra-virgin olive oil
1/2 cup pure maple syrup
1 tsp pure vanilla extract
6 ounces dark chocolate, chopped (1 cup)
My Notes:
1. I didn't work in batches. I didn't pre-chop the pecan halves. I just dumped it all in to the food processor and let it rip. I probably could have let the pecans grind down a little finer, but oh well.
2. I used a mix of pure maple syrup and agave because I didn't have enough of the maple syrup. Worked out fine.
3. These were very crumbly before baking. I found the best way to get them onto the cookie pan was to fill a 1/4 cup measuring cup, pack it in there with the spatula, overturn it onto the baking sheet, then flatten the mound slightly with the back of the measuring cup.
4. After baking, you really have to let them cool before picking them up because otherwise they crumble. They do hold together once cool, but they are pretty fragile and will crumble if you are too rough when you handle it.
5. Overall, my impression of this recipe is that's it's really a recipe for granola, but the recipe creator decided to throw in a little extra cornstarch and call them cookies. Because they are definitely a mouthful and very chewy-- soft granola is the best way I can think to describe it. I love that-- others, perhaps expecting a more "melt in your mouth" cookie experience, would be disappointed.
Pecan, Oat, and Dark Chocolate-Chunk Cookies
Active Time: 30 minutes
Total Time: 1 hour 10 minutes
Makes: 20
4 cups pecans, chopped
2 cups old fashioned rolled oats
1 1/2 tsp baking powder
1 tsp coarse salt
1 tsp cornstarch
1/2 cup extra-virgin olive oil
1/2 cup pure maple syrup
1 tsp pure vanilla extract
6 ounces dark chocolate, chopped (1 cup)
- Preheat oven to 325 degrees. Working in batches, pulse pecans in a food processor just until finely ground. Transfer to a bowl; stir in oats, baking powder, salt, and cornstarch. Make a well in center of mixture; add oil, maple syrup, and vanilla. Stir to combine. Fold in chocolate.
- Scoop quarter-cups of dough onto parchment-lined baking sheets. Flatten each slightly with palm of your hand to 1/2 inch thick.
- Bake, rotating sheets once, until cookies are light golden, about 20 minutes. Let cool completely on a wire rack before serving.
My Notes:
1. I didn't work in batches. I didn't pre-chop the pecan halves. I just dumped it all in to the food processor and let it rip. I probably could have let the pecans grind down a little finer, but oh well.
2. I used a mix of pure maple syrup and agave because I didn't have enough of the maple syrup. Worked out fine.
3. These were very crumbly before baking. I found the best way to get them onto the cookie pan was to fill a 1/4 cup measuring cup, pack it in there with the spatula, overturn it onto the baking sheet, then flatten the mound slightly with the back of the measuring cup.
4. After baking, you really have to let them cool before picking them up because otherwise they crumble. They do hold together once cool, but they are pretty fragile and will crumble if you are too rough when you handle it.
5. Overall, my impression of this recipe is that's it's really a recipe for granola, but the recipe creator decided to throw in a little extra cornstarch and call them cookies. Because they are definitely a mouthful and very chewy-- soft granola is the best way I can think to describe it. I love that-- others, perhaps expecting a more "melt in your mouth" cookie experience, would be disappointed.
Saturday, August 22, 2015
Chocolate Pecan "Cake"
Over the years I've saved many recipes in emails. They have accumulated over the years, and now the time has come to start actually cooking some of them and deleting the ones that I don't think I'll ever want to make again. And unfortunately, this recipe falls into that category. I don't remember where I found this online so no link to the original site.
The impetus for making this recipe was that we accidentally left chocolate chips in the car in 100+ degree heat on a road trip, and when we reached home we had a bag of chocolate goo.
My notes:
1. I followed the recipe for the most part. The only difference was the chocolate that had melted was semisweet, not bittersweet, so I reduced the amount of sugar. I did not opt to garnish this, but I don't think it would have changed my opinion of the recipe.
2. The resulting "cake" is not a cake. It is perhaps cake-like when it is first removed from the oven, but after it has been chilled, it is more "brownie" like-- but not really. It doesn't have the same smoothness as a brownie (understandably, as there's only 1 stick of butter). It's flourless, but not the best flourless cake I have had. Still, the DH, has made his way through it :)
Some photos:


Fudgy looking right?
The impetus for making this recipe was that we accidentally left chocolate chips in the car in 100+ degree heat on a road trip, and when we reached home we had a bag of chocolate goo.
Nana José’s Chocolate Pecan Cake
Adapted from Patricia Jinich
Time: 50 minutes
FOR THE CAKE:
1/4 cup plus 1 tablespoon unsalted butter or pareve margarine
6 ounces bittersweet chocolate
1 cup pecans
6 large eggs
1 teaspoon vanilla extract
1 cup sugar
Dash of salt
FOR THE GARNISH:
3 tablespoons grated piloncillo sugar or brown sugar
Finely grated zest of 1 lime
Juice of 2 limes (about 1/4 cup juice)
1 pint strawberries, washed, hulled and halved
1 pint blackberries, washed
Lightly sweetened whipped cream, optional.
1. For cake: Preheat oven to 350 degrees. Line a 9-inch springform pan with parchment paper and grease with 1 tablespoon butter.
2. Using a double boiler or pan over simmering water, melt together chocolate and remaining 1/4 cup butter. Set aside to cool.
3. Using a blender, chop pecans finely. Add eggs, vanilla, sugar, salt and melted chocolate mixture, blending until smooth. Pour batter into pan and bake until a toothpick inserted in center comes out clean, 40 to 45 minutes; cake should be moist but not wet. Allow to cool completely.
4. For the garnish: In a large mixing bowl, combine piloncillo or brown sugar, lime zest and lime juice. Add strawberries and blackberries, and toss gently. Just before serving, toss again and spoon on top of cake. If desired, serve with lightly sweetened whipped cream.
Yield: 8 to 10 servings.
My notes:
1. I followed the recipe for the most part. The only difference was the chocolate that had melted was semisweet, not bittersweet, so I reduced the amount of sugar. I did not opt to garnish this, but I don't think it would have changed my opinion of the recipe.
2. The resulting "cake" is not a cake. It is perhaps cake-like when it is first removed from the oven, but after it has been chilled, it is more "brownie" like-- but not really. It doesn't have the same smoothness as a brownie (understandably, as there's only 1 stick of butter). It's flourless, but not the best flourless cake I have had. Still, the DH, has made his way through it :)
Some photos:


Fudgy looking right?
Wednesday, August 12, 2015
Cheddar Bay Biscuits
So the hubby brought home fresh eggs. Goodness knows how he got them-- he gave me some story of his mentor's assistant raises chickens and brings raw, unpasteurized eggs to hospital to either give away or sell, and somehow he managed to acquire a half dozen. Which he of course forgot in the fridge of the hospital and so they came home several days later, and we finally got around to fussing with them a few days after that. So we had a half dozen not-so-fresh fresh eggs, and we (or I) decided to poach them. Of course. Because I love brunch, and I love eggs benedict and poaching an egg is something that would help me enjoy both of those things.
The DH was in charge of the poaching process which he did pretty well for his first attempt.
I was in charge of the biscuits. However, it was a Monday night, and though I knew I was going to be making biscuits, I hadn't really given it much thought. But in Google I trust, and so when I came across this Cheddar Bay biscuit copycat recipe, I decided to go for it. Nevermind that I've never been to Red Lobster and therefore I've never actually had the thing that this recipe promises to deliver, but I mean, come on-- Cheddar Bay? Where is that and what's the rent like there?
Red Lobster Cheddar Bay Biscuits
http://damndelicious.net/2014/02/03/red-lobster-cheddar-bay-biscuits/
My Notes:
1. I may have used slightly more cheese than the recipe called for. The resulting biscuit was delicious, but it perhaps didn't rise as well as it might have had I not burdened the dough with extra weight
2. Not sure if my oven actually reached 450 degrees (my oven is finicky and unreliable and I hate it. I loathe it.) and THAT's why the biscuits didn't rise so beautifully.
3. Or perhaps I should've shaped them better-- I sort of scooped and dumped the dough because these were drop biscuits and I wasn't feeling energetic enough to round them out.
4. So either because of the extra cheese or the oven, these were very undercooked. Delicious but undercooked-- they never developed that hard shell outside that biscuits should get. And so the melted butter topping just made things more soft. Delicious, but soft.
5. Great on the toaster oven reheat!
The DH was in charge of the poaching process which he did pretty well for his first attempt.
I was in charge of the biscuits. However, it was a Monday night, and though I knew I was going to be making biscuits, I hadn't really given it much thought. But in Google I trust, and so when I came across this Cheddar Bay biscuit copycat recipe, I decided to go for it. Nevermind that I've never been to Red Lobster and therefore I've never actually had the thing that this recipe promises to deliver, but I mean, come on-- Cheddar Bay? Where is that and what's the rent like there?
Red Lobster Cheddar Bay Biscuits
http://damndelicious.net/2014/02/03/red-lobster-cheddar-bay-biscuits/
INGREDIENTS
- 2 cups all-purpose flour
- 1 tablespoon sugar
- 1 tablespoon baking powder
- 2 teaspoons garlic powder
- 1/2 teaspoon kosher salt
- 1/4 teaspoon cayenne pepper, optional
- 1 cup buttermilk
- 1/2 cup unsalted butter, melted
- 1 1/2 cups shredded sharp cheddar cheese
- 3 tablespoons unsalted butter, melted
- 1 tablespoon chopped fresh parsley leaves
- 1/2 teaspoon garlic powder
FOR THE TOPPING
INSTRUCTIONS
- Preheat oven to 450 degrees F. Line a baking sheet with parchment paper or a silicone baking mat; set aside.
- In a large bowl, combine flour, sugar, baking powder, garlic powder, salt and cayenne pepper, if using.
- In a large glass measuring cup or another bowl, whisk together buttermilk and butter. Pour mixture over dry ingredients and stir using a rubber spatula just until moist. Gently fold in cheese.
- Using a 1/4-cup measuring cup, scoop the batter evenly onto the prepared baking sheet. Place into oven and bake for 10-12 minutes, or until golden brown.
- For the topping, whisk together butter, parsley and garlic powder in a small bowl. Working one at a time, brush the tops of the biscuits with the butter mixture.
- Serve immediately.
My Notes:
1. I may have used slightly more cheese than the recipe called for. The resulting biscuit was delicious, but it perhaps didn't rise as well as it might have had I not burdened the dough with extra weight
2. Not sure if my oven actually reached 450 degrees (my oven is finicky and unreliable and I hate it. I loathe it.) and THAT's why the biscuits didn't rise so beautifully.
3. Or perhaps I should've shaped them better-- I sort of scooped and dumped the dough because these were drop biscuits and I wasn't feeling energetic enough to round them out.
4. So either because of the extra cheese or the oven, these were very undercooked. Delicious but undercooked-- they never developed that hard shell outside that biscuits should get. And so the melted butter topping just made things more soft. Delicious, but soft.
5. Great on the toaster oven reheat!
Monday, August 3, 2015
Whole Wheat Focaccia
So this weekend was rather lazy one for both of us. I worked on Saturday, and the DH has been studying all weekend for some professional exams. But nevertheless we managed to find time to cook up some delicious things-- mini quiches, veggie loaffins, channa masala, imitation spicy lentil wraps, and some focaccia bread
Here's the recipe, from Martha Rose Shulman's "Recipes for Health" column in the NYTimes:
Whole-Wheat Focaccia
This is a very easy bread and welcomes any number of toppings or fillings. Three variations on the flour mix follow the recipe; you can use more whole-wheat flour or less than is called for in this recipe, which uses half whole-wheat and half all-purpose. When I use Community Grains whole-wheat flour, a California flour made from ancient strains of wheat that is milled in such a way that it is very fine but retains all of its nutrients, I can get away with using a lot. Coarser whole-wheat flours are best used in combination with all-purpose.
2 teaspoons (8 grams) active dry yeast
1 teaspoon (5 grams) sugar
1 1/2 cups (340 grams) lukewarm water
2 tablespoons (25 grams) olive oil, plus 1 to 2 tablespoons (25 grams) for drizzling
250 grams (approximately 2 cups) whole-wheat flour
200 to 220 grams (approximately 1 2/3 to 1 3/4 cups) unbleached all-purpose flour or bread flour, plus additional as needed for kneading
1 3/4 teaspoons (13 grams) salt
1. In the bowl of a standing mixer, or in a large bowl, dissolve the yeast and sugar in the water. Add 2 tablespoons (25 grams) olive oil, the whole-wheat flour, 200 grams of the all-purpose flour and salt and mix together briefly using the paddle attachment. Change to the dough hook and beat for 8 to 10 minutes at medium speed, adding flour as necessary. The dough should eventually form a ball around the dough hook and slap against the sides of the bowl as the mixer turns; it will be sticky. Remove from the bowl, flour your hands and knead the dough for a minute on a lightly floured surface, and shape it into a ball.
2. If kneading the dough by hand, dissolve the yeast in the water with the sugar as directed. Stir in the olive oil, whole-wheat flour, salt and all-purpose flour by the half-cup, until the dough can be scraped out onto a floured work surface. Knead, adding flour as necessary, for 10 minutes, until the dough is elastic and smooth. Shape into a ball.
3. Clean and dry your bowl and oil lightly with olive oil. Place the dough in it, rounded side down first, then rounded side up. Cover tightly with plastic and let rise in a warm spot for 1 1/2 to 2 hours, or in the refrigerator for 4 to 8 hours, until doubled.
4. Punch down the dough. Cover with lightly oiled plastic and let the dough rest for 15 minutes.
5. Preheat the oven to 425 degrees, preferably with a baking stone in it. Line a sheet pan with parchment and oil generously. Roll or press out the dough into a rectangle the size of the sheet pan. To do this efficiently, roll or press out the dough, stop and wait 5 minutes for the gluten to relax, then roll or press out again, and repeat until the dough reaches the right size. Cover with a damp towel and let rest for 30 minutes. Just before baking, use your fingertips to dimple the dough all over, and drizzle on a tablespoon or two of olive oil.
6. Bake, setting the pan on top of the baking stone (if using), for 20 to 25 minutes, until deep golden brown. Let rest for at least 10 minutes before serving, or allow to cool completely.
Note: You can divide the dough in half and make 2 smaller focacce that would fit 14-inch pizza pans.
Yield: 1 large focaccia or 2 smaller focacce, 12 to 15 pieces.
My Notes:
1. I used 350 grams of KAF Whole Wheat Flour and used 100 grams of All purpose flour. I accidentally drizzled in 6 extra grams of olive oil so I ended up using up more whole wheat flour because the dough was pretty sticky.
2. I definitely kneaded the dough for the full 10 minutes. I normally skimp on kneading time when in comes to dough, but I set a timer for this one, and I think as a result the bread was very even and consistently airy throughout.
3. I used a full packet of Active Dry Yeast (I didn't measure out the grams) and it was fine.
4. We ended up slicing the focaccia lengthwise and stuffing it with olives, artichokes (we'd steamed them the previous weekend), feta, and roasted garlic. Delicious.
5. It went down pretty easily, for a healthy, whole-wheat recipe.
Monday, June 29, 2015
Apricot Quick Bread
So the in-laws visited this past weekend, and with them they brought pounds and pounds of fruit. Cherries (5 lbs), plums (1 lb), cherry plums (3 lbs), kumquats (1 lb), tangerines (3 lbs), pineapple (2 lbs), angelcots ( 2lbs), and apricots (3 lbs). We already had our own fruit-- mangoes, necarines, apples, and bananas, so it suffices to say we are overwhelmed and the threat of rotting fruit and flies is weighing heavily on us. When I opened the bag of apricots, some of them were already starting to go. What to do? I'd already made an apricot cherry crumble just a few weeks ago, and I didn't want to go that route again. I was already plotting a pie with the cherries, so I didn't want another pie. I wanted something quick too, something I could whip up for brunch on a Sunday morning before the in-laws left. After much searching, I found this, from the Sun Sentinel website:
Easy Apricot Bread
2 cups whole-wheat flour
1 / 2 cup firm-packed light brown sugar
2 teaspoons baking soda
1 / 2 teaspoon ground cinnamon
2 pounds fresh apricots, peeled, pitted and pureed*
2 large eggs, lightly beaten
1 / 4 cup vegetable oil (we use canola)
2 teaspoons pure vanilla extract
Preheat the oven to 350 degrees. Grease and flour well a 9-by-5-inch loaf pan. Set aside.
In a large mixing bowl, whisk together the flour, sugar, baking soda and cinnamon.
In another smaller bowl, combine the apricot puree, eggs, oil and vanilla; mix well.
Add
the apricot mixture to the dry ingredients, mixing just until blended.
Do not over mix. Transfer the batter to the prepared pan and bake in the
center of the oven 55 to 60 minutes or until a skewer inserted into the
center comes out clean.
Cool
in the pan 8 minutes, then remove to a wire rack to cool completely.
Refrigerate overnight for easy slicing. Makes 16 servings.
Per serving: 143
calories, 29 percent calories from fat, 5 grams total fat, .5 grams
saturated fat, 27 milligrams cholesterol, 23 grams carbohydrates, 3
grams total fiber, 11 grams total sugars, 20 grams net carbs, 4 grams
protein, 168 milligrams sodium.
*Use a food processor fitted with the metal blade or a good blender to puree the apricots.
My thoughts:
1. First off adjustments. I put in a heaping teaspoon of cinnamon, and I used half a teaspoon of almond extract and one and a half teaspoons of vanilla extract. I also baked the bread in two loaves because it did NOT fit in a 9" by 5" loaf pan. It needed the full hour. I left about a half an inch of space for the bread to rise, and that was fine.
2. Overall taste? Nothing exciting. The apricot flavor was really overwhelmed by the bitterness of the whole wheat flour and then extracts. But it was soft and not very sweet, which apparently pleased the in-laws
3. It basically reminds me of a pumpkin bread-- the fruit puree is providing the moisture in the place of more oil or butter.
4. It may be better with white flour, and perhaps with a cream cheese glaze or something to add a little more flavor or tartness.
Nectarine-Cobbler Cornmeal Upside Down Cake
Ingredients
- 5 1/2 ounces (1 stick plus 3 tablespoons) unsalted butter, softened
- 1 cup sugar
- 3 medium ripe peaches (about 1 1/4 pounds), skins on, pitted, and cut into 3/4-inch wedges
- 1 cup coarse yellow cornmeal or polenta
- 3/4 cup all-purpose flour
- 1 teaspoon baking powder
- 2 teaspoons chopped fresh lavender, or 1 1/2 teaspoons dried lavender
- 1 1/4 teaspoons coarse salt
- 3 large eggs
- 1/2 teaspoon pure vanilla extract
- 1/2 cup heavy cream
Directions
-
Preheat oven to 350 degrees. Melt 3 tablespoons butter in a 10-inch cast-iron skillet over medium heat, using a pastry brush to coat sides with butter as it melts. Sprinkle 1/4 cup sugar evenly over bottom of skillet, and cook until sugar starts to bubble and turn golden brown, about 3 minutes. Arrange peaches in a circle at edge of skillet, on top of sugar. Arrange the remaining wedges in the center to fill. Reduce heat to low, and cook until juices are bubbling and peaches begin to soften, 10 to 12 minutes. Remove from heat.
-
Whisk cornmeal, flour, baking powder, lavender, and salt in a medium bowl. Beat remaining stick of butter and 3/4 cup sugar with a mixer on high speed, until pale and fluffy, about 3 minutes. Reduce speed to medium. Add eggs, 1 at a time, beating well after each addition and scraping down sides of bowl. Mix in vanilla and cream. Reduce speed to low, and beat in cornmeal mixture in 2 additions.
-
Drop large spoonfuls of batter over peaches, and spread evenly using an offset spatula. Bake until golden brown and a tester inserted in the center comes out clean, 20 to 22 minutes. Transfer skillet to a wire rack, and let stand for 10 minutes. Run a knife or spatula around edge of cake. Quickly invert cake onto a cutting board. Tap bottom of skillet to release peaches, and carefully remove skillet. Reposition peach slices on top of cake. Let cool slightly before serving.
Death by Chocolate Chocolate Chip Cookies
So I wanted to make the "Artpark Brownie" recipe from Ruth Reichl's hilarious memoir Tender at the Bone for the bookclub meeting were having to discuss the book, but life got in the way.
So, these cookies:
My Thoughts:
So, these cookies:
Ingredients
- 1 cup all-purpose flour
- 2/3 cup unsweetened cocoa powder
- 1 1/2 teaspoons baking powder
- 1/4 teaspoon salt
- 9 ounces semisweet chocolate, coarsely chopped
- 3/4 cup (1 1/2 sticks) butter, cut up
- 3 large eggs
- 1 cup granulated sugar
- 1/3 cup firmly packed light brown sugar
- 1 teaspoon vanilla extract
- 1 1/3 cups semisweet chocolate chips
- 1 1/2 cups coarsely chopped pecans
- 6 ounces white chocolate, coarsely chopped
- Preheat the oven to 325°F. Butter four cookie sheets.
- 2Sift the flour, cocoa, baking powder, and salt into a large bowl. Melt the semisweet chocolate and butter in a double boiler over barely simmering water. Beat the eggs and granulated and brown sugars in a large bowl with an electric mixer at high speed until creamy. Beat in the chocolate mixture and vanilla. Mix in the dry ingredients, chocolate chips, pecans, and white chocolate.
- 3Drop tablespoons of the dough 4 inches apart onto the prepared cookie sheets. Use the bottom of a glass to flatten the cookies slightly. Bake, one sheet at a time, for 8-10 minutes, or until cracked on top. Transfer to racks to cool. Yield 24 cookies.
My Thoughts:
Tuesday, June 16, 2015
Beet Burger
So this weekend, we came back from a long vacation to a sparsely stocked fridge. But we did have a few beets and I knew it was time to make these beet burgers from the post punk kitchen that had caught my eye a long, long time ago.
The recipe:


My Notes:
1. Used the food processor and it was clutch in shredding those beets.
2. Brown rice was good-- I didn't really wait for it to cool before I mixed it in.
3. I used several cloves of garlic and upped the amount of dry spices used and almond butter
4. The dough was very sticky and easy to mold. Made for easy cooking.
5. The DH fried them on the pan, and complied after several reminders to try for 8 minutes per side,
6. Delicious. Crunchy on the outside, but not dry on the inside at all. Not sweet. Great flavor-- I really like the fennel.
7. We doubled the recipe and had about 16 small-medium patties.
The recipe:
1 1/4 cups cooked, cooled brown rice
1 cup cooked brown or green lentils, cooled, drained well
1 cup shredded beets
1/2 teaspoon salt
Fresh black pepper
1 teaspoon thyme, rubbed between your fingers
1/2 teaspoon ground fennel (or finely crushed fennel seed)
1 teaspoon dry mustard
3 tablespoons very finely chopped onion
2 cloves garlic, minced
2 tablespoons smooth almond butter
1/2 cup very fine breadcrumbs
Olive oil for the pan
Peel beets and shred with the shredder attachment of your food processor, then set aside. Change the attachment to a metal blade. Pulse the brown rice, shredded beets and lentils about 15 to 20 times, until the mixture comes together, but still has texture. It should look a lot like ground meat:
Now transfer to a mixing bowl and add all the remaining ingredients. Use your hands to mix very well. Everything should be well incorporated, so get in there and take your time, it could take a minute or two.
Place the mixture in the fridge for a half hour to chill.
Preheat a cast iron pan over medium-high. Now form the patties. Each patty will be a heaping 1/2 cup of mixture. To get perfectly shaped patties, use a 3 1/2 inch cookie cutter or ring mold (I have pics of how to do it here.) Otherwise, just shape them into burgers with your hands.
Pour a very thin layer of oil into the pan and cook patties for about 12 minutes, flipping occasionally. Do two at a time if you’re pan isn’t big enough. Drizzle in a little more oil or use a bottle of organic cooking spray as needed. Burgers should be charred at the edges and heated through.
Serve immediately. But they taste pretty great heated up as well, so if you want to cook them in advance, refrigerate, then gently heat in the pan later on, then that is cool, too.
My Photos:

My Notes:
1. Used the food processor and it was clutch in shredding those beets.
2. Brown rice was good-- I didn't really wait for it to cool before I mixed it in.
3. I used several cloves of garlic and upped the amount of dry spices used and almond butter
4. The dough was very sticky and easy to mold. Made for easy cooking.
5. The DH fried them on the pan, and complied after several reminders to try for 8 minutes per side,
6. Delicious. Crunchy on the outside, but not dry on the inside at all. Not sweet. Great flavor-- I really like the fennel.
7. We doubled the recipe and had about 16 small-medium patties.
Monday, May 25, 2015
Apricot Blueberry Cherry Crisp.
Ahh, fruit season is heeeeere! Apricots? Check. Half flat of strawberries? Yes, please. Oranges, apples, bananas, cherries, blueberries, plums, nectarines, pluots, peaches, melons, pineapple... do you even have to ask? Organic Bartlett pears? Hand them over! Just because the weather in the city has been dreary this Memorial Day weekend, doesn't mean the kitchen has to be.

So we may or may not have gone a little overboard on the produce purchases, and rather than risk the decay of a pound of apricots, I made an apricot blueberry cherry crisp.
The recipe I used was basically this one from The Kichn, copied below:
Blueberry and Apricot Crumble
MY NOTES:
1. I didn't really measure the fruit. I think I used about a cup and a half of blueberries, a pound of apricots, and two large handfuls of cherries. Here they are looking all lovely together as they macerate:

2. No lemons in the house. After thinking about it, I consulted with the DH and we agreed to try orange juice. I'm the more cautious of the two of us when it comes to substitutions, so when he immediately pulled out the lemon press and cavalierly started juicing the orange into the fruit mix, no measuring cups in sight, I may have shoved him to the side and threatened physical violence. But only out of love-- for him and for the delicate summer stone fruit. Because I had spent the better part of the past hour pitting cherries and apricots, and couldn't handle the thought of this dish coming out tasting like oranges. Anyway, lesson learned: orange juice works. I wish I could say how much went in but it couldn't have been more than juice from half an orange. No zest.
3. No sliced almonds, so I just used a mix of roasted pecans, raw walnuts, raw almonds, and roasted cashews all chopped up-- way more than a fourth of a cup-- and it turned out fine. I forgot about the nutmeg in the topping, so it lacked some flavor. Mixed everything by hand.
4. It came out fine. The filling was VERY liquidy which makes me think perhaps I should've tossed the fruit in a tablespoon or so of flour. I forgot to take a pic of the crisp when it was whole (of course), but here it is after I drained all the extra juice... into my mouth.

5. The combination works! The cherries are especially lovely as they plump up with the juice from the other fruit.
6. Would I make this particular recipe again? Probably not. Nothing really stood out about it. But was it yummy-- yes, with all those fruits and nuts, how could it not be.
7. The DH was in charge of the mutter aloo tofu and here's a gratuitous shot of that. What a talented man he is!


So we may or may not have gone a little overboard on the produce purchases, and rather than risk the decay of a pound of apricots, I made an apricot blueberry cherry crisp.
The recipe I used was basically this one from The Kichn, copied below:
Blueberry and Apricot Crumble
Fruit
1 1/2 pounds fresh apricots
1/2 pint (6 to 8 ounces) fresh blueberries
Zest and juice of 1/2 lemon
1/4 cup packed light brown sugar
1/4 teaspoon freshly ground nutmeg
1 1/2 pounds fresh apricots
1/2 pint (6 to 8 ounces) fresh blueberries
Zest and juice of 1/2 lemon
1/4 cup packed light brown sugar
1/4 teaspoon freshly ground nutmeg
Topping
3/4 cup all-purpose flour
1/4 cup rolled oats
1/4 cup sliced almonds
1/4 cup + 2 tablespoons packed light brown sugar
1/4 teaspoon freshly ground nutmeg
Pinch salt
1 (4-ounce) stick chilled butter, cut into cubes
Preheat oven to 350°F and have ready an 8x10-inch baking dish.
3/4 cup all-purpose flour
1/4 cup rolled oats
1/4 cup sliced almonds
1/4 cup + 2 tablespoons packed light brown sugar
1/4 teaspoon freshly ground nutmeg
Pinch salt
1 (4-ounce) stick chilled butter, cut into cubes
Preheat oven to 350°F and have ready an 8x10-inch baking dish.
For the fruit
Halve, pit, and quarter the apricots and combine in a bowl with the blueberries, lemon zest and juice, brown sugar, and nutmeg. Set aside to macerate while you prepare the topping.
Halve, pit, and quarter the apricots and combine in a bowl with the blueberries, lemon zest and juice, brown sugar, and nutmeg. Set aside to macerate while you prepare the topping.
For the topping
In another bowl, combine flour, oats, almonds, brown sugar, nutmeg, and salt. Using your fingers, rub the butter into the mixture until it forms clumps.
In another bowl, combine flour, oats, almonds, brown sugar, nutmeg, and salt. Using your fingers, rub the butter into the mixture until it forms clumps.
Give the fruit a stir and then pour it into the baking dish, making sure apricots and blueberries are evenly distributed. Evenly sprinkle the topping over the fruit.
Bake in the oven until topping is golden brown and fruit is bubbling around the sides, about 40 minutes. Remove from oven and let sit at least 20 minutes before serving.
MY NOTES:
1. I didn't really measure the fruit. I think I used about a cup and a half of blueberries, a pound of apricots, and two large handfuls of cherries. Here they are looking all lovely together as they macerate:

2. No lemons in the house. After thinking about it, I consulted with the DH and we agreed to try orange juice. I'm the more cautious of the two of us when it comes to substitutions, so when he immediately pulled out the lemon press and cavalierly started juicing the orange into the fruit mix, no measuring cups in sight, I may have shoved him to the side and threatened physical violence. But only out of love-- for him and for the delicate summer stone fruit. Because I had spent the better part of the past hour pitting cherries and apricots, and couldn't handle the thought of this dish coming out tasting like oranges. Anyway, lesson learned: orange juice works. I wish I could say how much went in but it couldn't have been more than juice from half an orange. No zest.
3. No sliced almonds, so I just used a mix of roasted pecans, raw walnuts, raw almonds, and roasted cashews all chopped up-- way more than a fourth of a cup-- and it turned out fine. I forgot about the nutmeg in the topping, so it lacked some flavor. Mixed everything by hand.
4. It came out fine. The filling was VERY liquidy which makes me think perhaps I should've tossed the fruit in a tablespoon or so of flour. I forgot to take a pic of the crisp when it was whole (of course), but here it is after I drained all the extra juice... into my mouth.

5. The combination works! The cherries are especially lovely as they plump up with the juice from the other fruit.
6. Would I make this particular recipe again? Probably not. Nothing really stood out about it. But was it yummy-- yes, with all those fruits and nuts, how could it not be.
7. The DH was in charge of the mutter aloo tofu and here's a gratuitous shot of that. What a talented man he is!

Friday, May 22, 2015
Banana Pancakes
Sunday morning was pancake morning in my house. Every week, after five days straight of oatmeal or cream of wheat, Saturday would be cereal day and Sunday would be pancake morning. I woke up when my mom did and would help her in the kitchen. She used a mix-- usually the Betty Crocker Just Add Water kind, although occasionally we'd buy Aunt Jemima or Bisquick.-- and would mix the water in and go. The first one would always be too light, but then after that she always got them that perfect Denny's-commercial-worthy golden brown color. We used Parkay Squeeze margarine on top of the pancakes and topped it heavily with the Aunt Jemima or Log Cabin sugar syrup.
And although now I scoff at box mixes, margarine, and fake syrup, I still love pancakes. Thus the ongoing search for the best recipe. Last week, the DH and I made breakfast for dinner after a long work week. He cooked the frittata and I made pancakes using this recipe:
Everyday Pancakes, by Mark Bittman
(http://cooking.nytimes.com/recipes/1893-everyday-pancakes)
INGREDIENTS
- 2 cups all-purpose flour
- 2 teaspoons baking powder
- ¼ teaspoon salt
- 1 tablespoon sugar, optional
- 2 eggs
- 1 ½ to 2 cups milk
- 2 tablespoons melted and cooledbutter (optional), plus unmelted butter for cooking, or use neutral oil
PREPARATION
- Heat a griddle or large skillet over medium-low heat. In a bowl, mix together dry ingredients. Beat eggs into 1 1/2 cups milk, then stir in 2 tablespoons melted cooled butter, if using it. Gently stir this mixture into dry ingredients, mixing only enough to moisten flour; don't worry about a few lumps. If batter seems thick, add a little more milk.
- Place a teaspoon or 2 of butter or oil on griddle or skillet. When butter foam subsides or oil shimmers, ladle batter onto griddle or skillet, making pancakes of any size you like. Adjust heat as necessary; usually, first batch will require higher heat than subsequent batches. Flip pancakes after bubbles rise to surface and bottoms brown, after 2 to 4 minutes.
- Cook until second side is lightly browned. Serve, or hold on an ovenproof plate in a 200-degree oven for up to 15 minutes.
- MY NOTES:
- 1. I smashed in a very ripe banana into the batter-- delicious as always. I also added walnuts and some chocolate chips and served warm real maple syrup on the side.
- 2. I also made these on a Griddler because it allows me to make several at once. I set both plates for 350 degrees.
- 3. I halved the recipe, but otherwise really made no adjustments. I left out the tablespoon of sugar.
- 4. These ended up being a little dry, even with the banana-- probably because I let them sit too long on the griddler. And ask the pictures show, they didn't turn out that beautiful even tan color that my mother's pancakes had.
- 5. I've also included a picture of the DH's frittata because he's rather proud of it.


Subscribe to:
Posts (Atom)